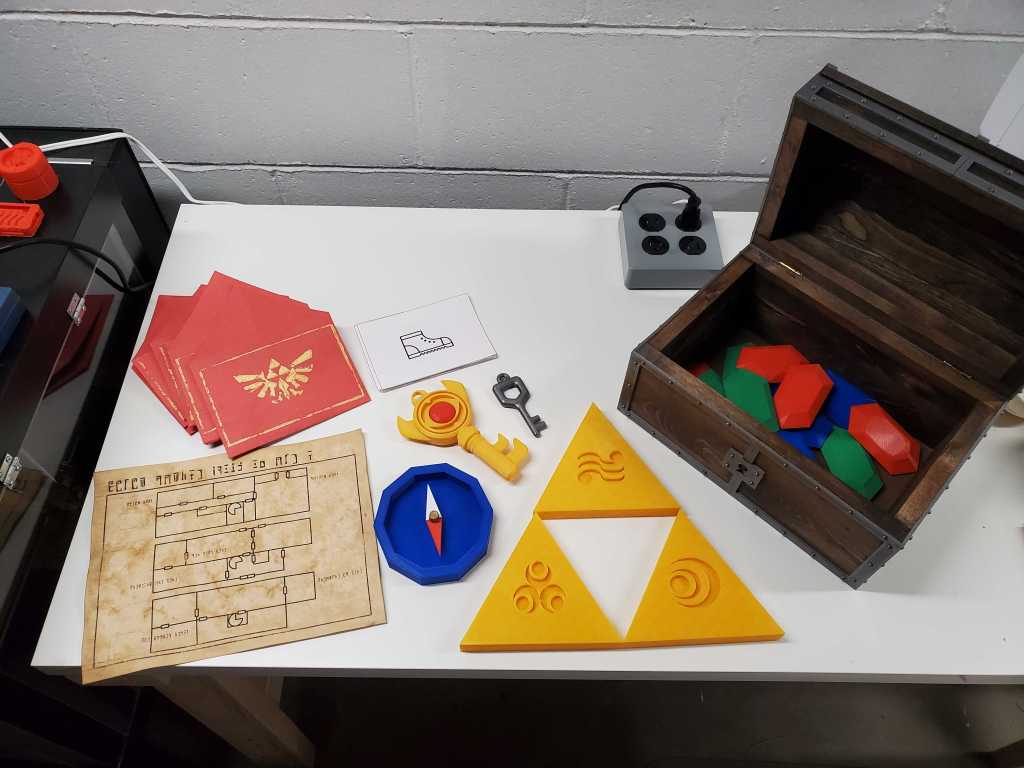
Continuing the project I started in Part 1, to complete the Zelda Quest I needed to make a treasure chest filled with rupees and, of course, the legendary Triforce!
The Chest
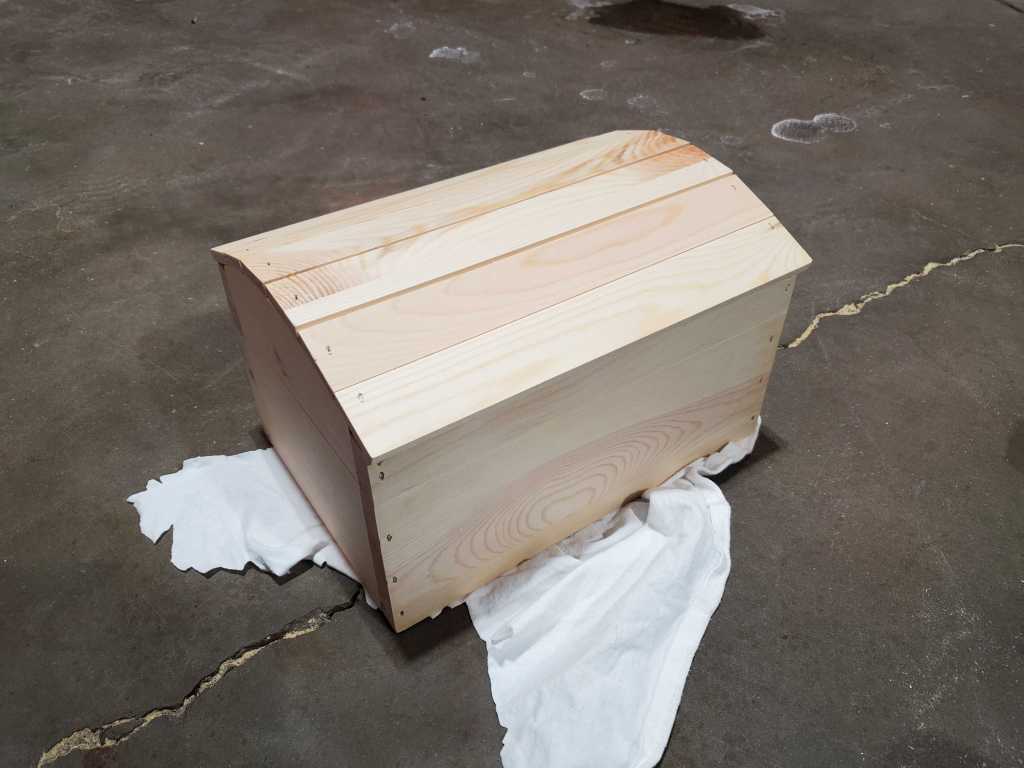
For the treasure chest, I started with a simple treasure chest I got from Michaels.
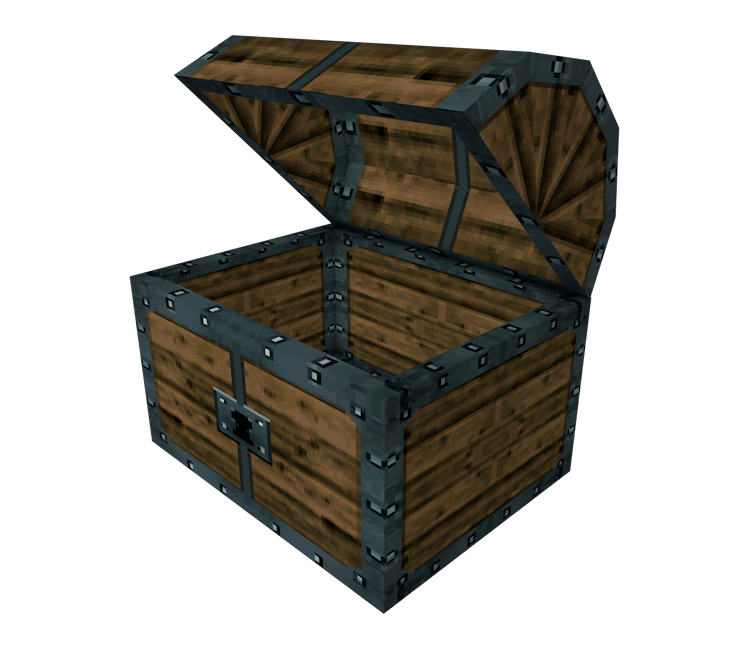
I was modeling everything in this set of Zelda treasure from Ocarina of Time, so I looked to the Ocarina of Time treasure chest for inspiration on how to fancy it up.
To mimic this chest, I began by applying a coat of dark stain to the chest. Since this was a cheap chest from Michaels, I went with a Minwax stain from Lowes.
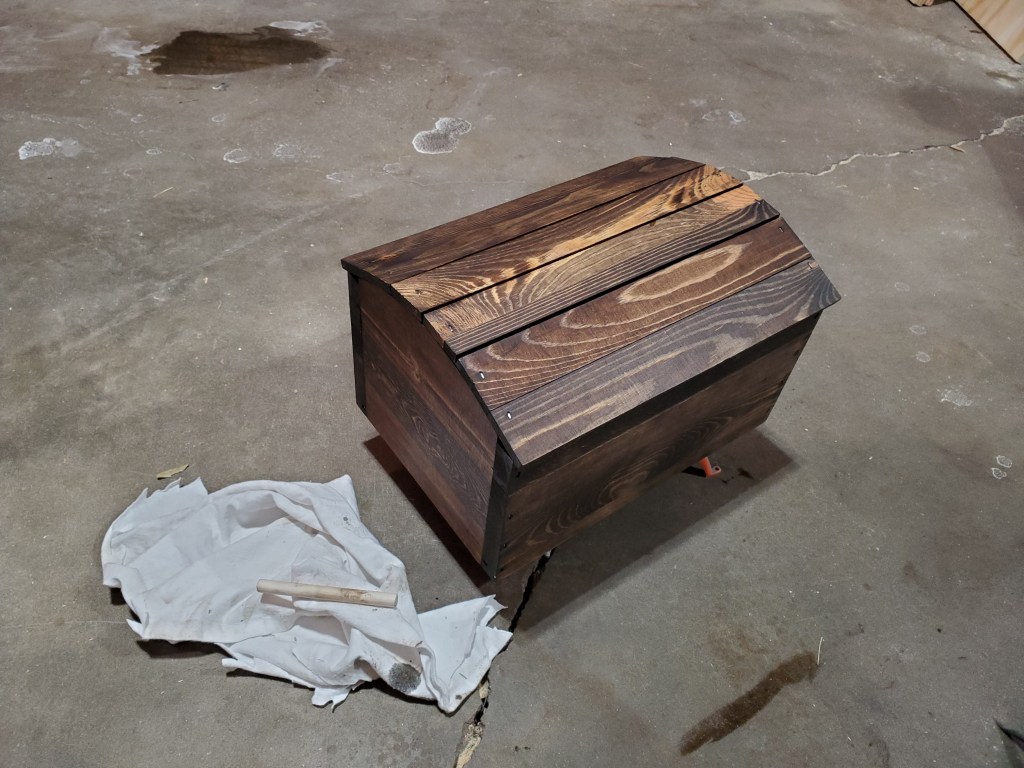
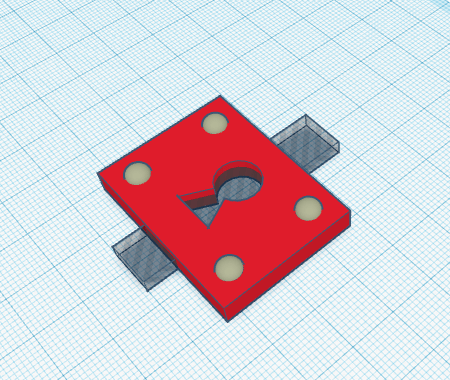
A quick application of the stain and the chest improved dramatically! To finish the look I wanted to replicate the iron banding on the chest, so I turned to my 3D Printer. I took some measurements of all of the faces and then jumped to Tinkercad to start modeling them. Most of the frames were simple models – a rectangle with a hole in it, adorned with hemispheres to act as the nails.
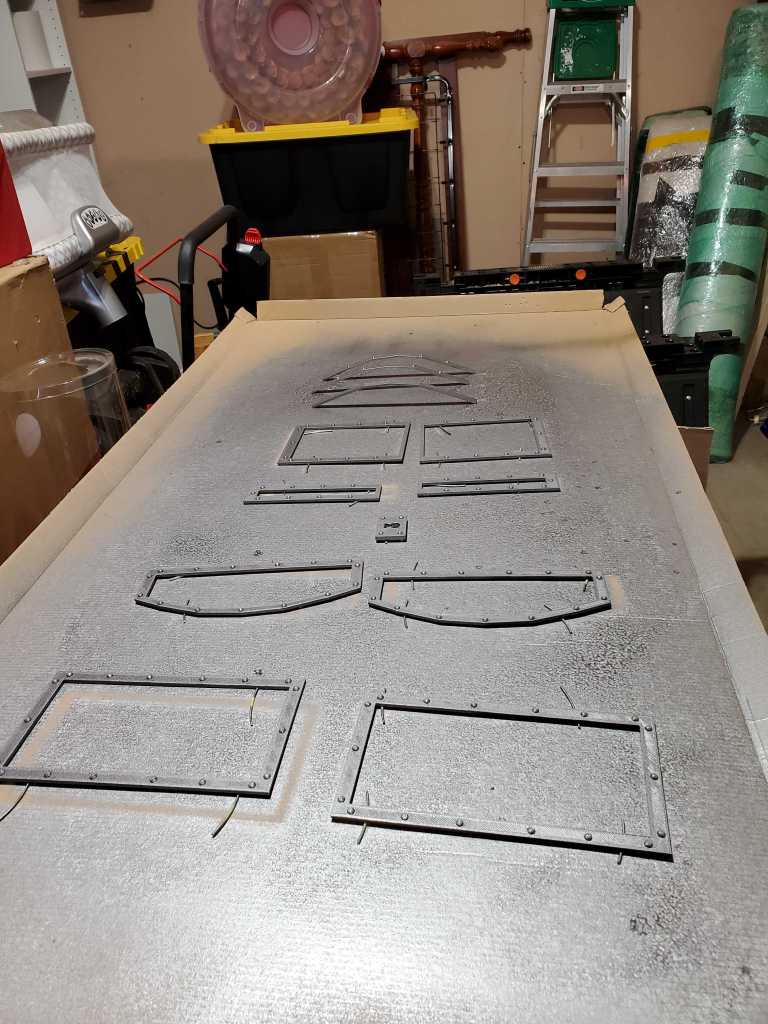
The frames printed out very easily and test fit with no problem, except for the curved banding around the top. The chest was not very uniformly constructed due to being so cheap, so it was easier to roughly print out the curve and clamp it to the top with some super glue. As of writing this, that method has held up very well and shows no sign of failing. The banding was printed out with a dark grey PLA+ and then lightly coated with a metallic spray paint.
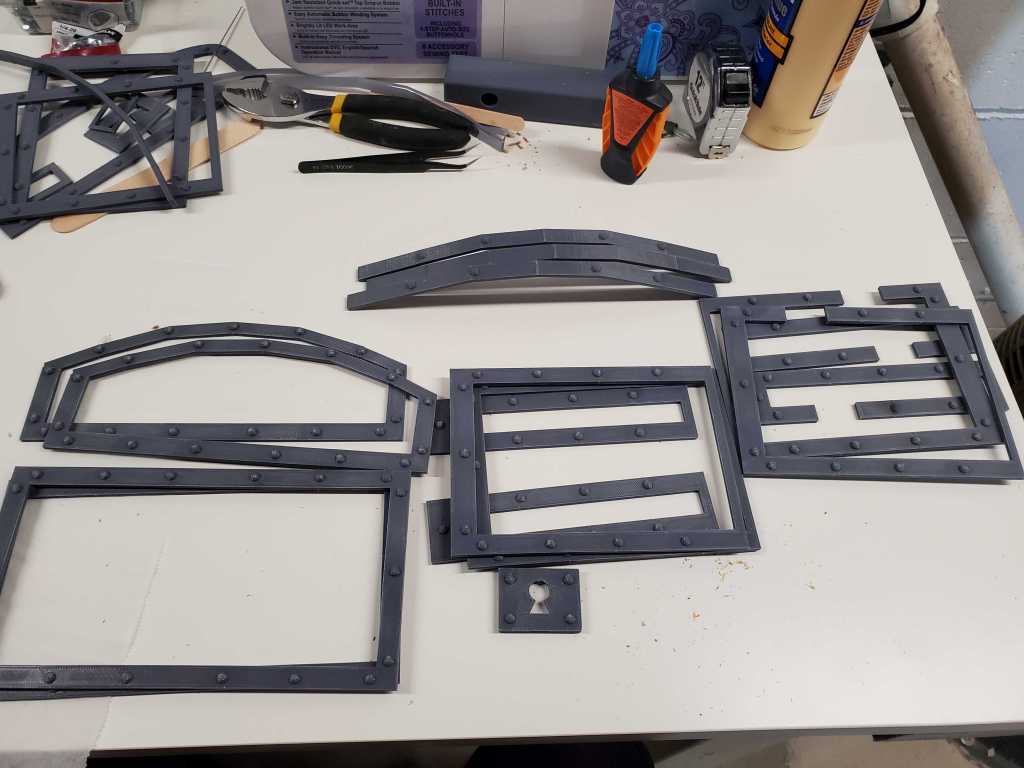
All of the banding was attached to the chest with super glue after a test fit to make sure there weren’t any glaring problems with the models.

The Rupees
For the rupees, I printed out this rupee model in dark blue, dark green, and red to have a nice stash.

I had previously coated the eye of the Boss Key with some glossy Mod Podge and it gave it a wonderful gem look, so I thought, why not make the rupees shiny in the same way? It turns out, coating a small gem in a divot with Mod Podge works completely differently than coating an entire large gem. The Mod Podge did not smooth out no matter how I tried to brush it and the rupees ended up looking a little lumpy. They are acceptable to play with for a little one, but if I had to do these again, I think I would have tried a glossy spray paint to get a shiny finish.

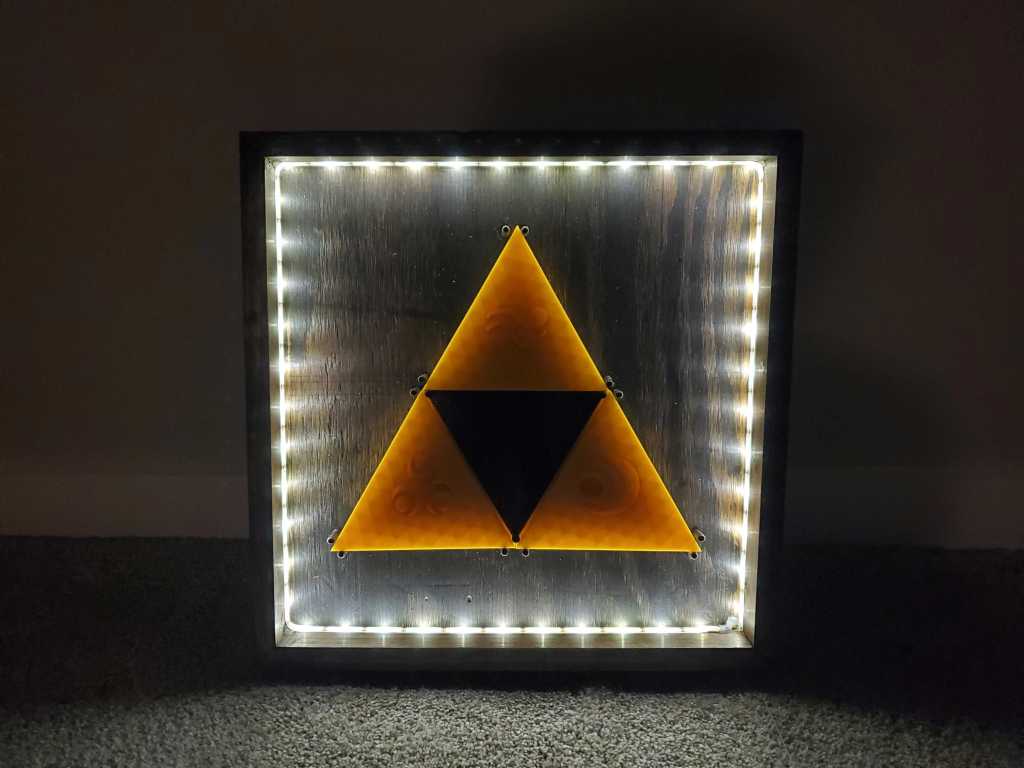
The Triforce
The end goal of the quest was the ultimate Legend of Zelda treasure – the Triforce! Of everything to model, these are of course the easiest, being simple gold triangular prisms. I made some simple prisms in Tinkercad, and then added the symbol for each of the pieces, Power, Wisdom, and Courage, as a way to tell them apart.
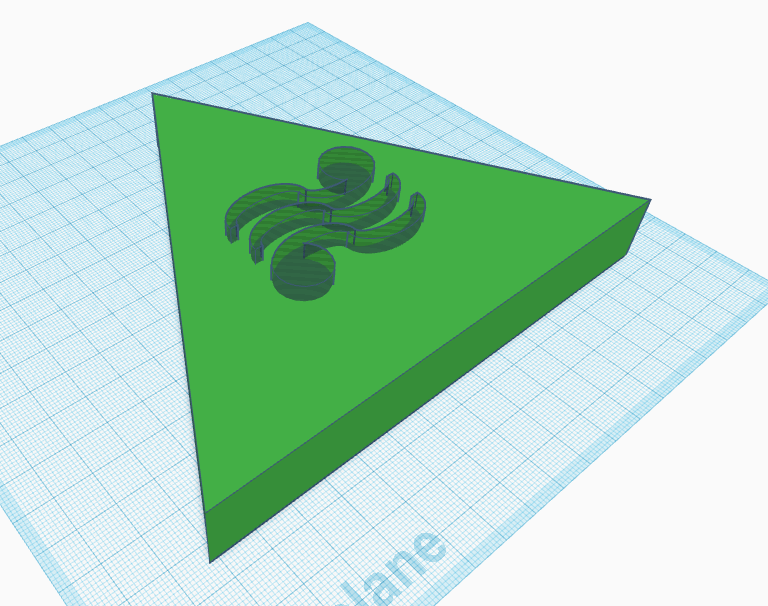
They were printed out in a gold-yellow filament, and at a 25% infill made a neat triangular pattern that shows through the thin surface. You can find the models on Thingiverse.

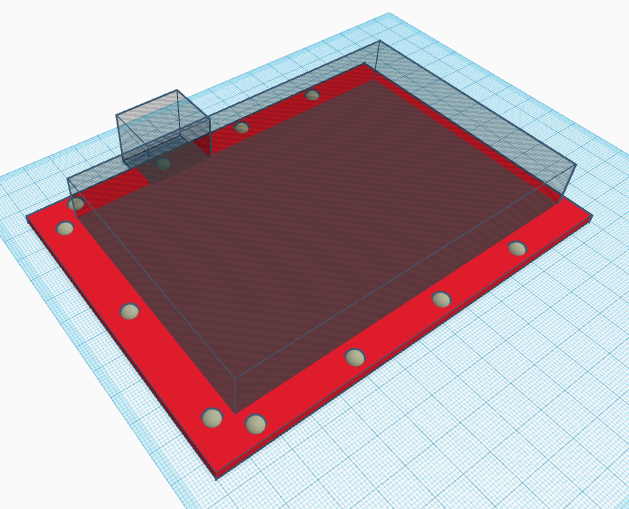
And because the Triforce needs a Sacred Realm, I had to whip together a display case for it! I got some leftover wood from my Christmas Tree Display project and cut out a quick mitered box and glued it to the plywood frame back. I barely had enough clamps to make that work.
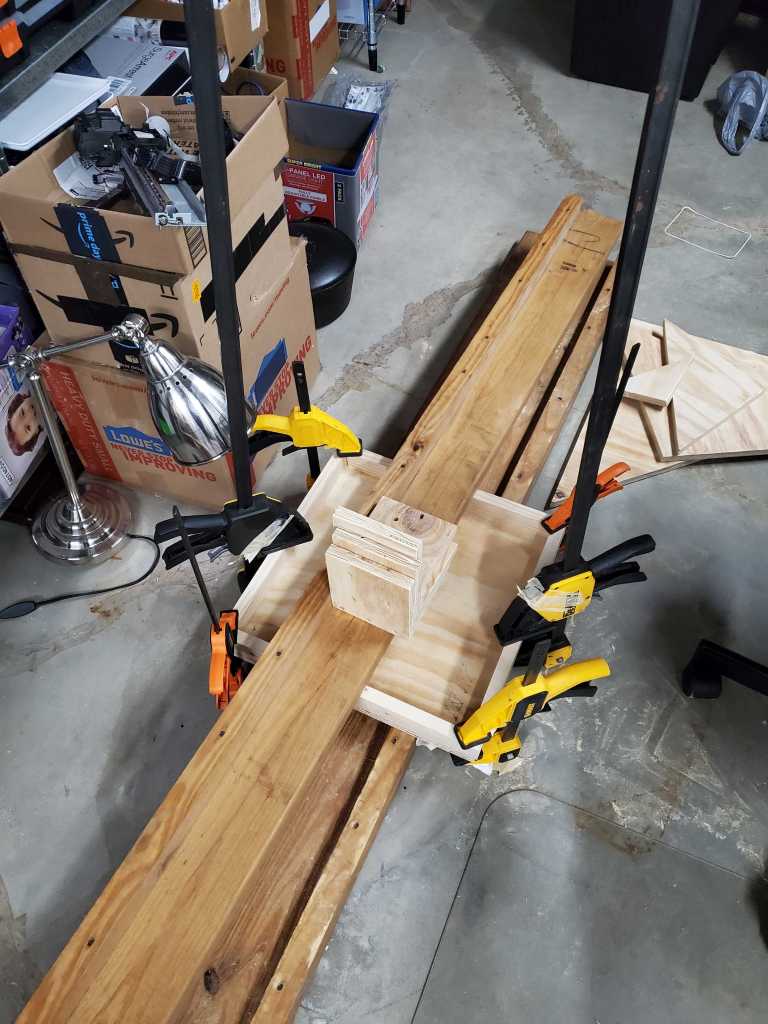
To hold the Triforce, I traced where they would lay in the box then marked corners of each triangle. At each of the corners I drilled and glued a short dowel to create a triangle shaped slot for the Triforce to fit.
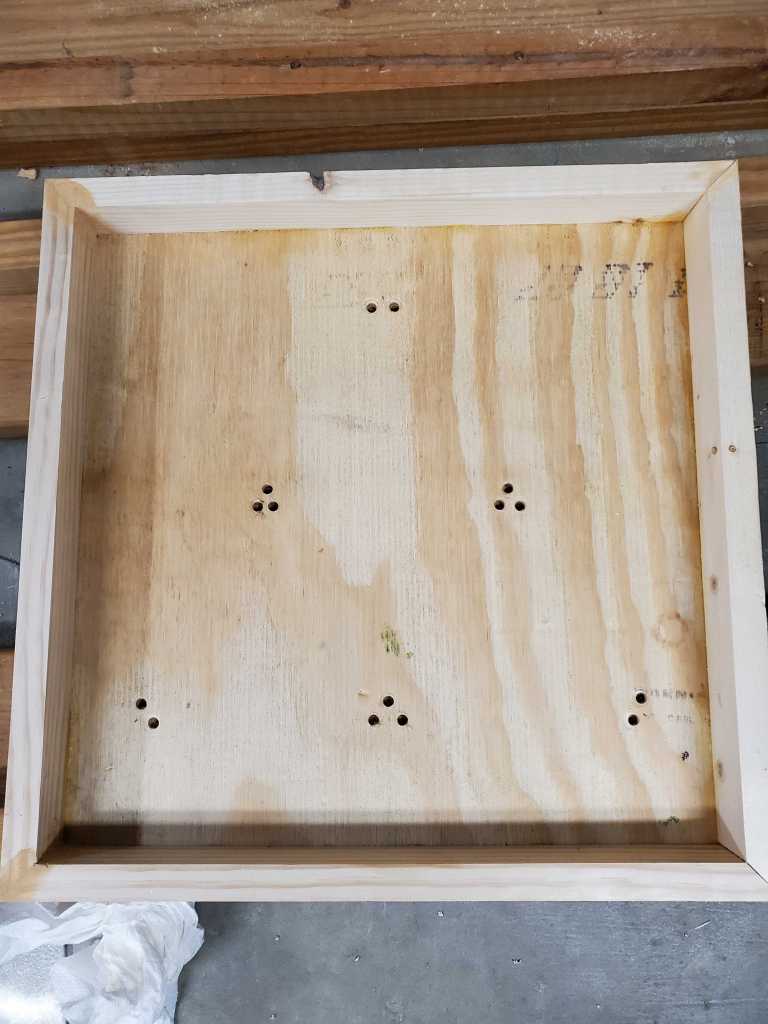

I sanded the whole thing down and applied a Dark Walnut stain to the box. After the stain dried, I cut a white, battery-powered LED strip to size and glued it around the inside of the box. I secured the battery pack to the back with a screw, and I had a display worthy of the Triforce!
Quest Complete!
The Zelda Quest was a huge hit! Our little one had a ton of fun running around the house finding all the items she knew from the Legend of Zelda series. With so many parts to get together, I was able to complete this project in a reasonable amount of time with relatively few hiccups!
