It has become a tradition in our house to get at least one of the LEGO Advent Calendar sets before Christmas. After completing several of these, we have amassed a sizable collection of holiday themed LEGO and wanted some way to display the current calendar and the previous LEGO. After looking at different Christmas display stands, I found a model that looked like it would be a good fit, as well as a design on YouTube by 731 Woodworks that looked like it would be doable in the short time before Christmas (on top of all the other projects I had planned).
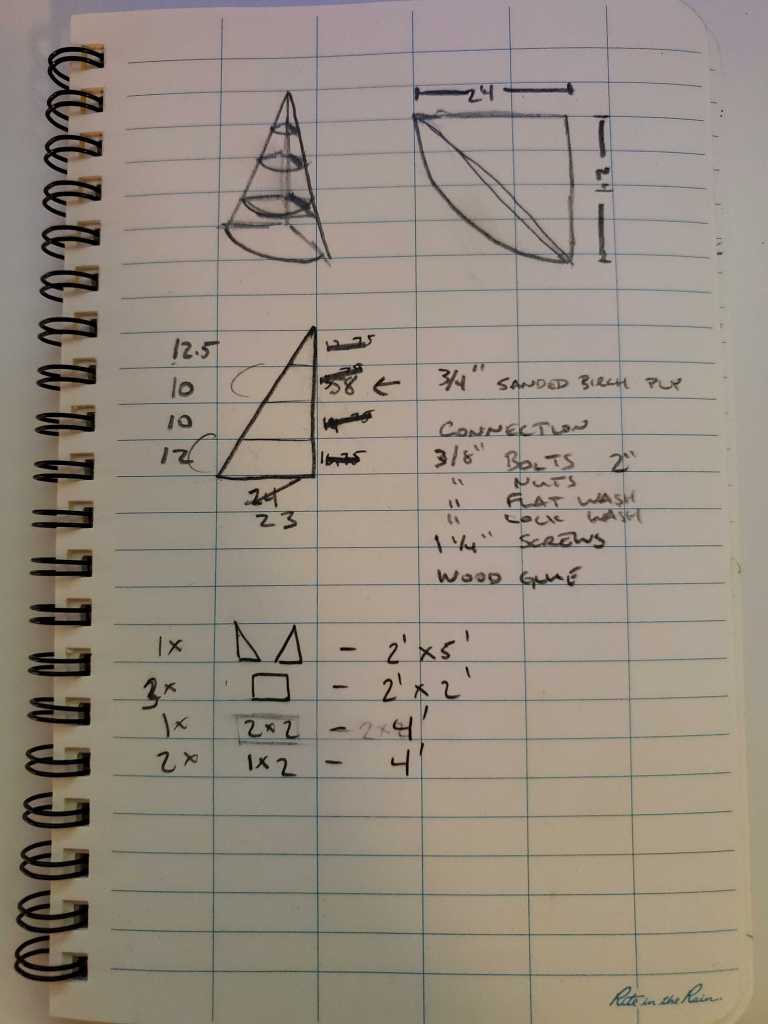
Designed for a corner, I had to adjust the original plan’s dimensions for the corner I was building it in. I settled on a 2 ft x 2ft base, which would give a few inches on each end of the wall corner so there would be no chance of an overhang. To keep a similar profile to the design I was working off of, I set the height of the tree to be 4 ft (unlike my original plans above).
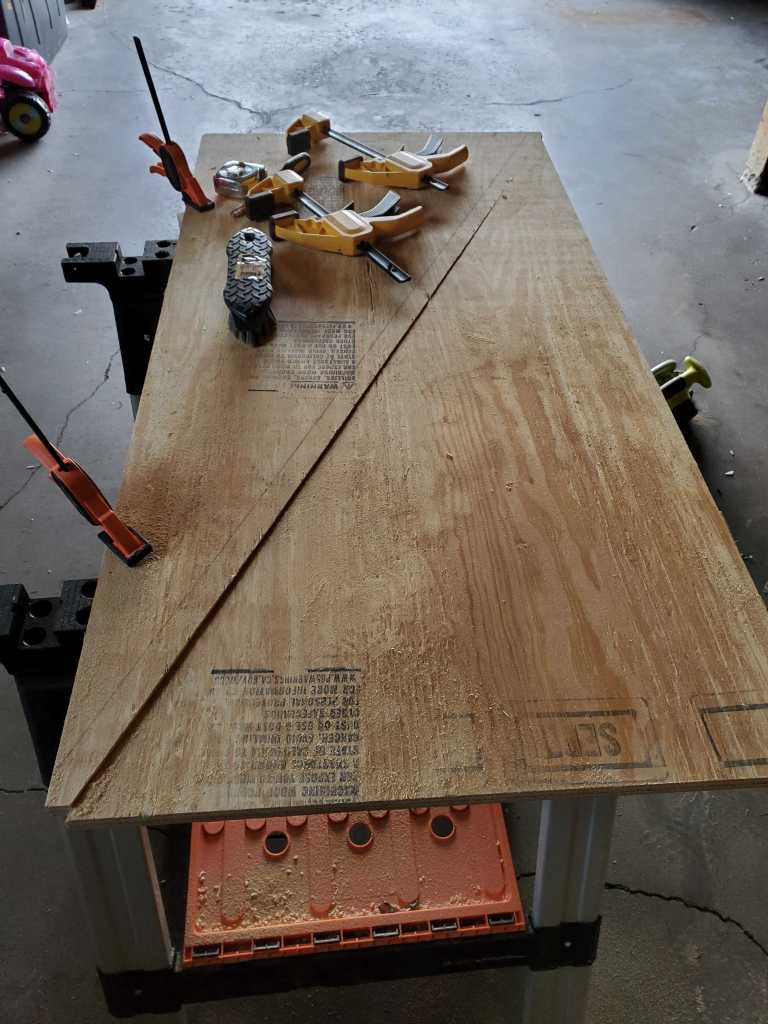
From a 2 ft x 4 ft piece of 3/4″ plywood, I drew a diagonal measured 23″ on one side and 47″ on the other. I did this for two reasons: with the width of the plywood the final depth will still be within 2 ft and if the diagonal cut was not perfectly straight (since I had no way to attached a diagonal guide) it would not be also marring the other side.

Once the two large triangles are cut, I marked where I would place the shelves, lining up both triangles so that the shelves would match up.
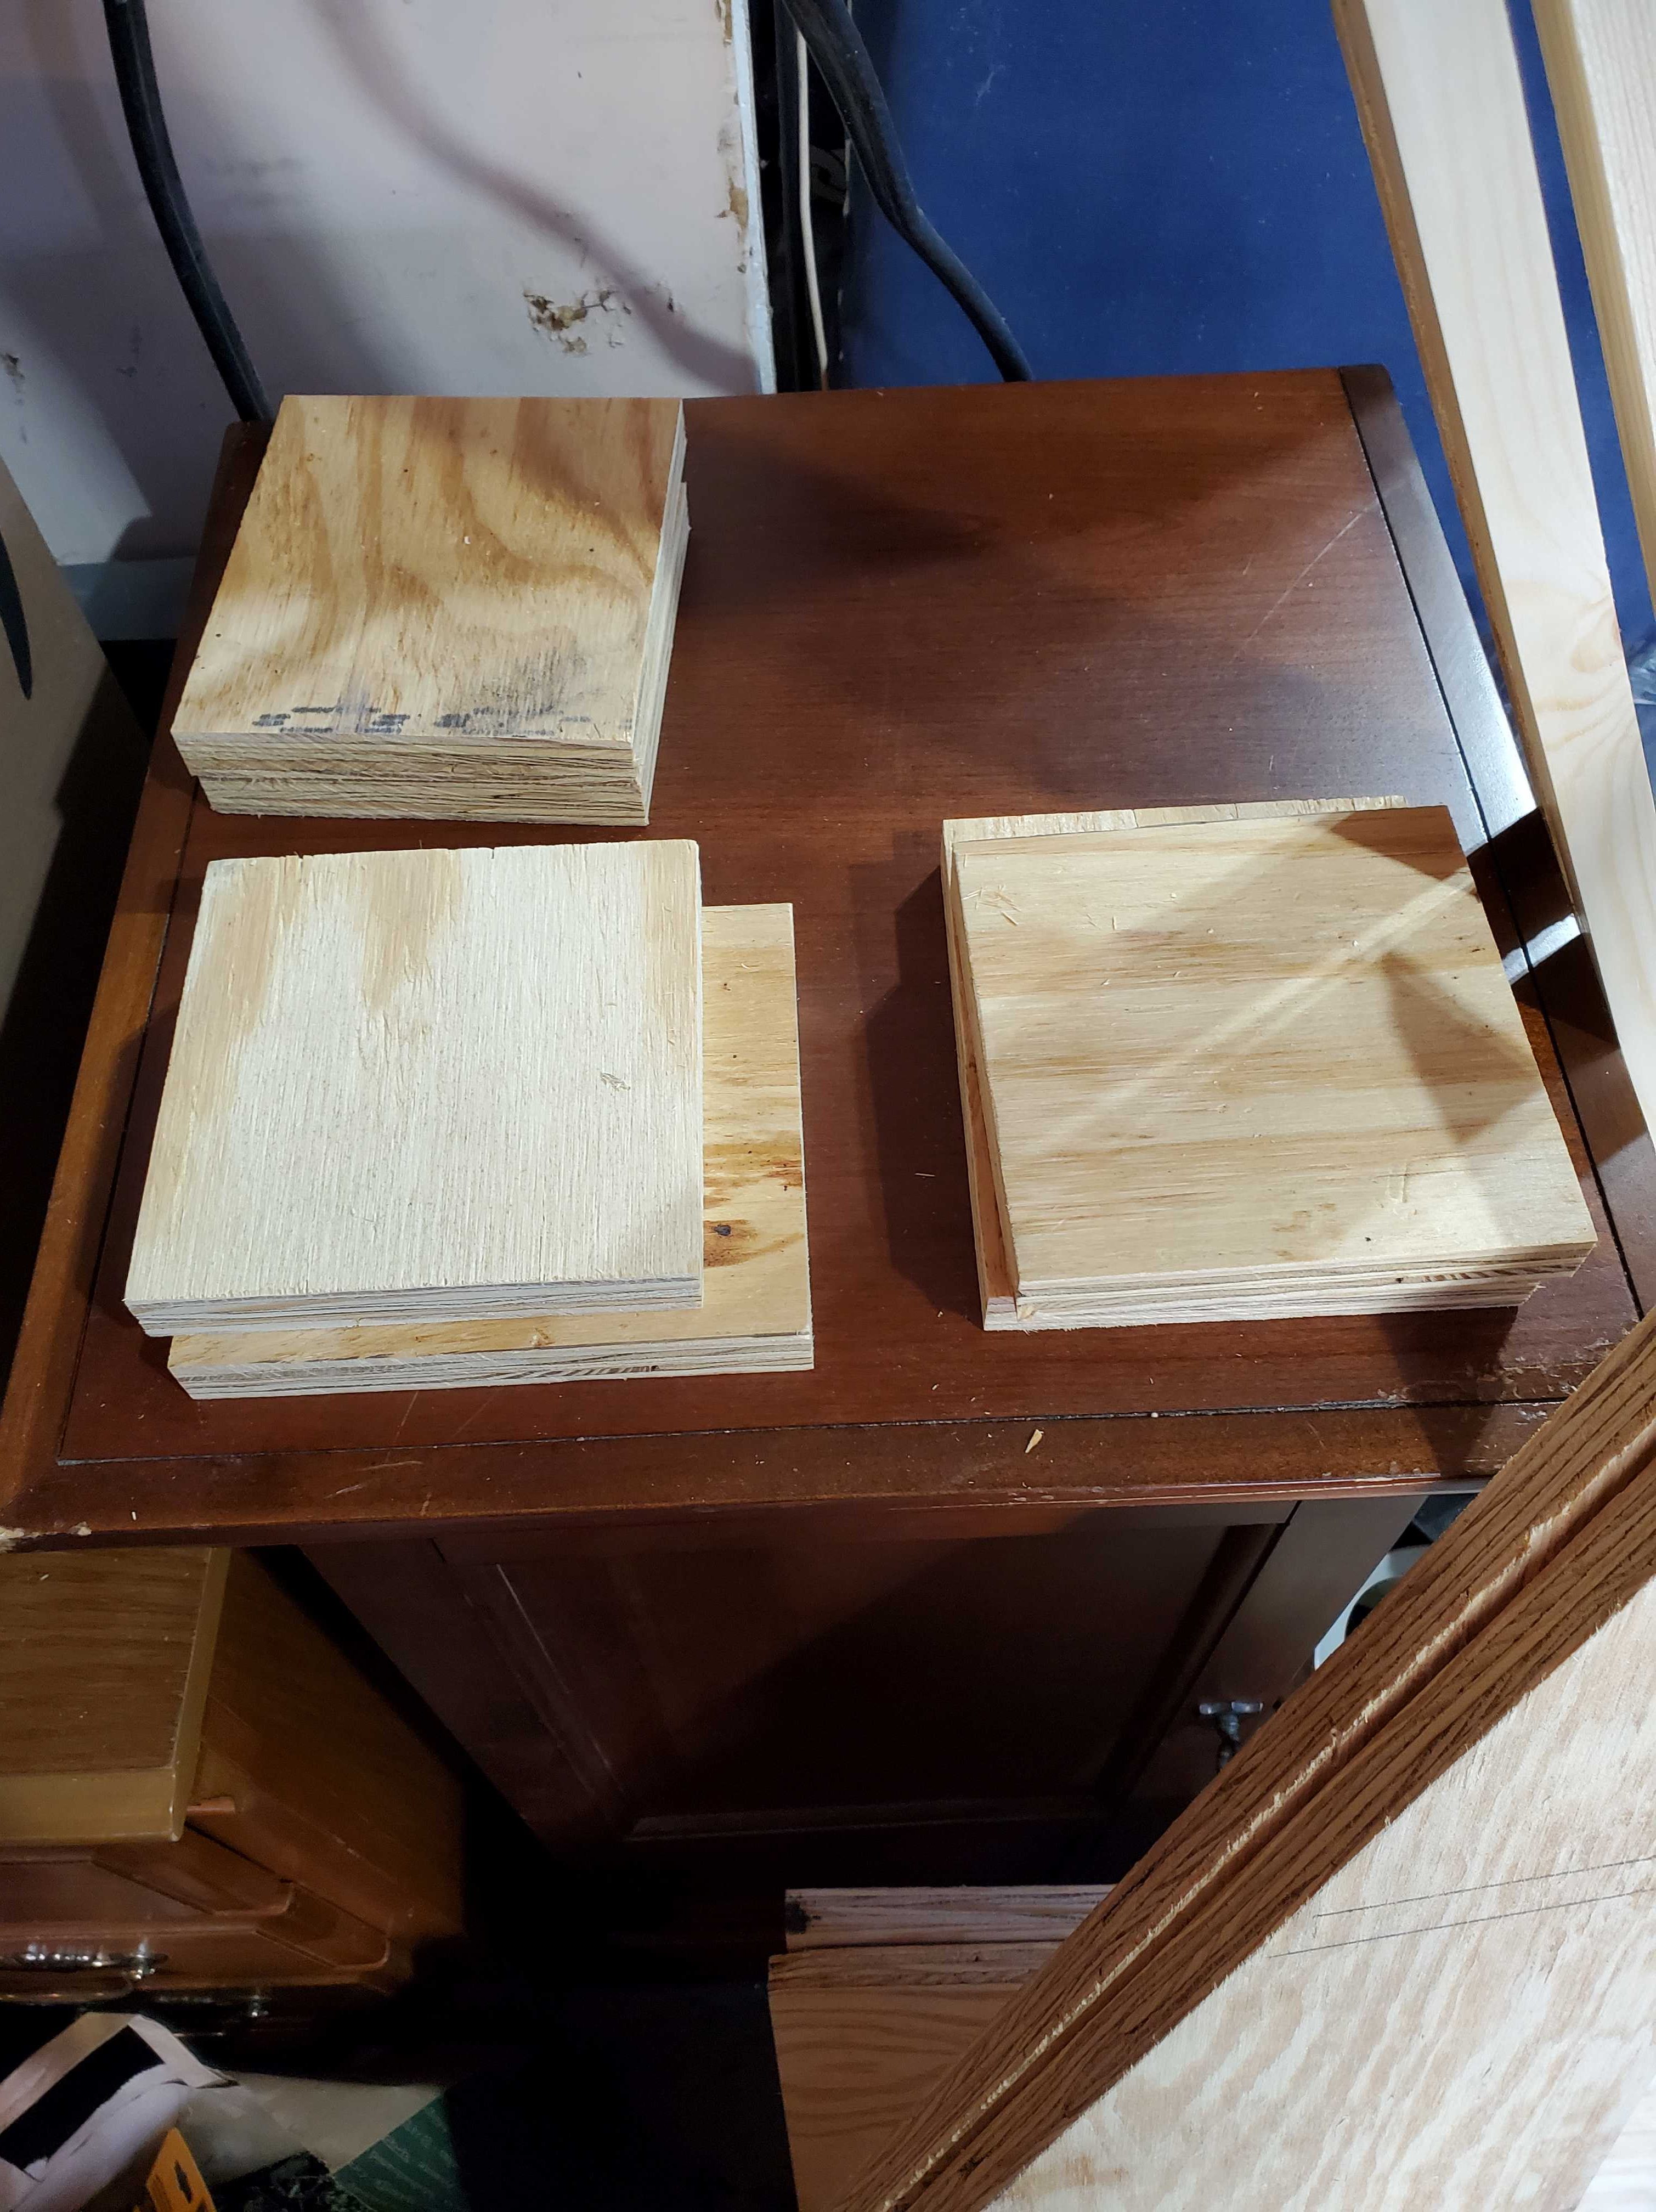
To connect the two triangles together and make them easy to disassemble, I created three brackets by first cutting 6 squares, making one of each pair 3/4″ shorter so that when connected, the bracket will be square. I then connected them together with wood glue and screws, making sure they are square.
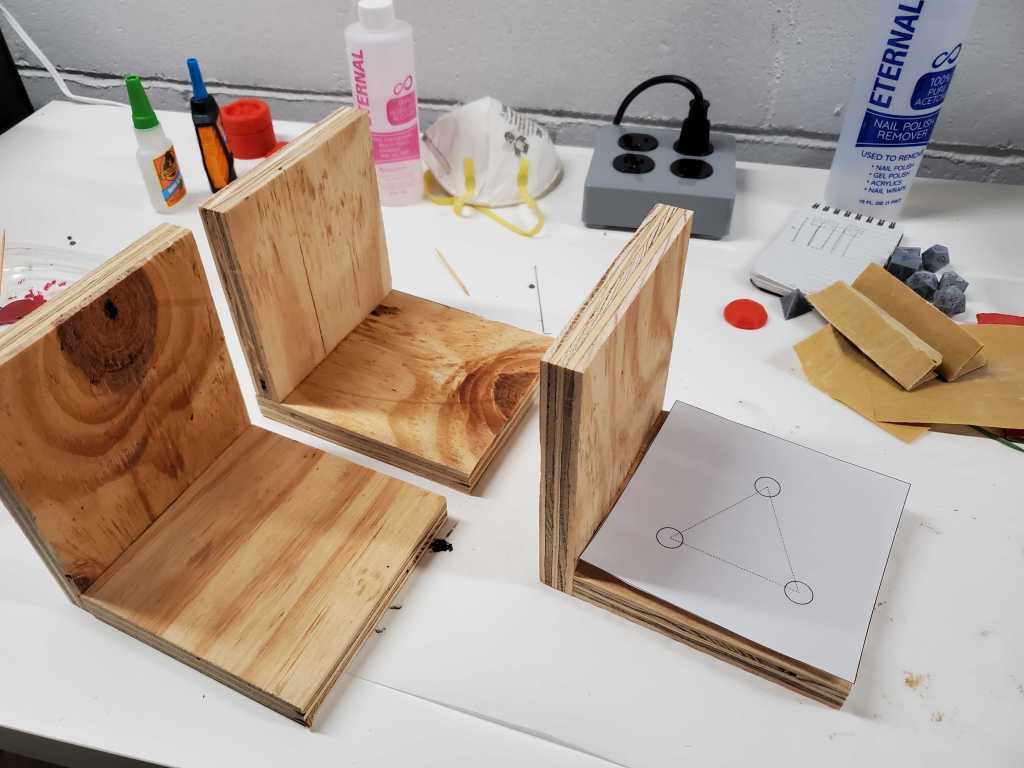
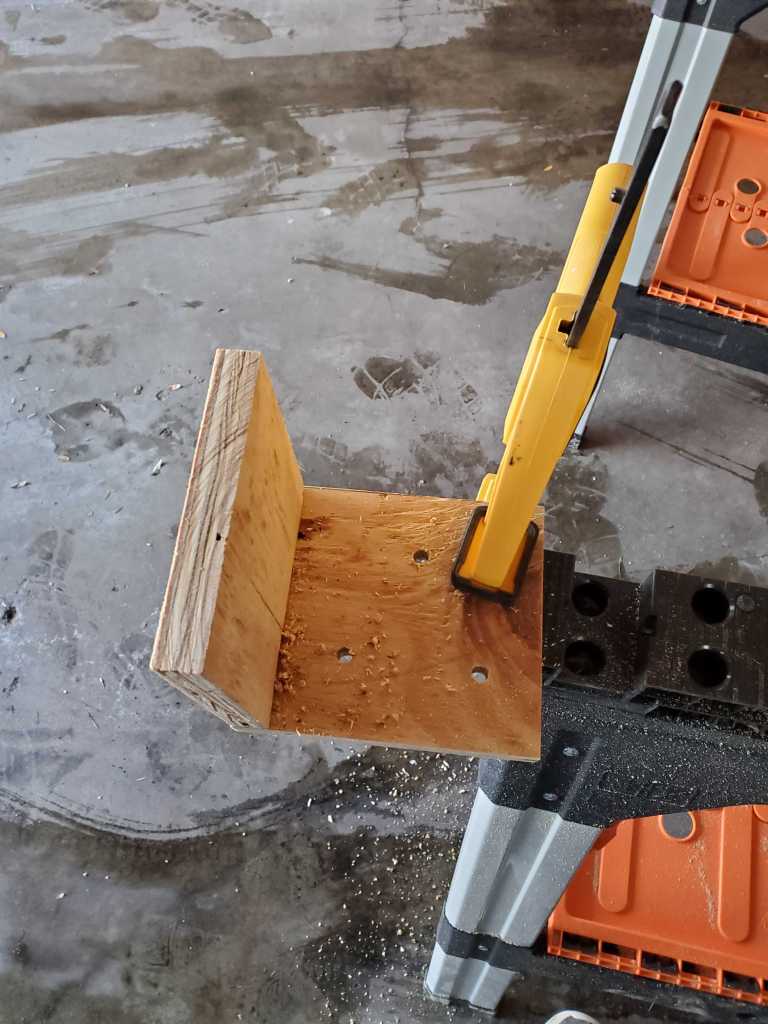
Once the brackets were made, I made a template for drilling the bolt holes and drilled 3 bolt holes on each side of the bracket.
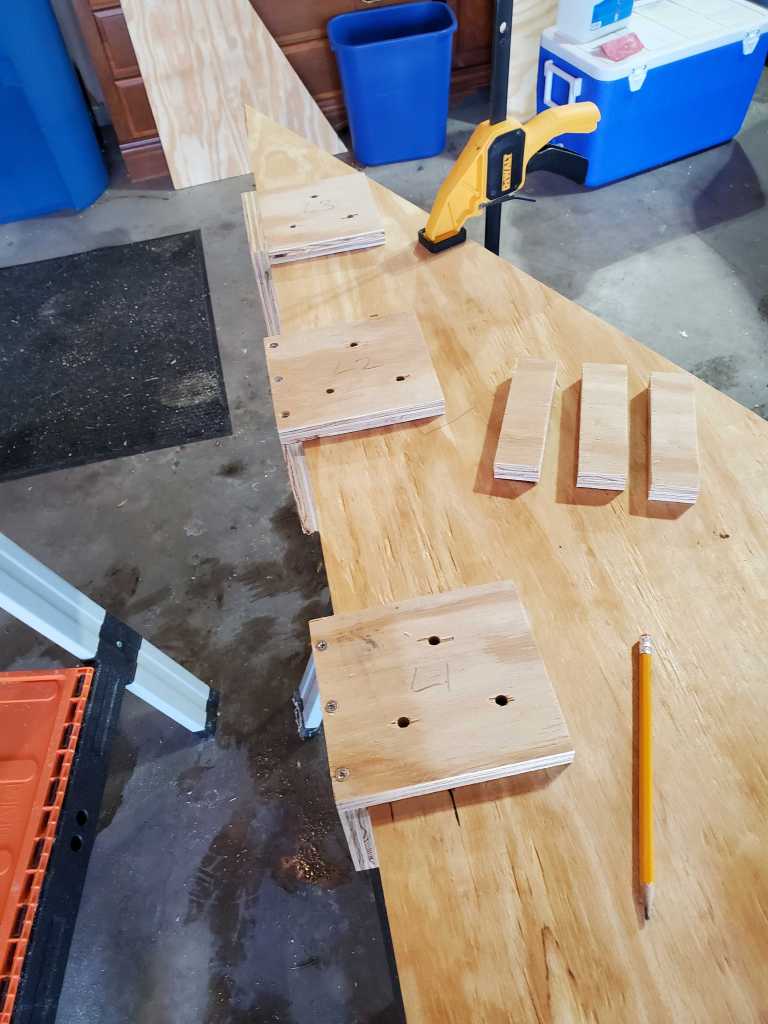
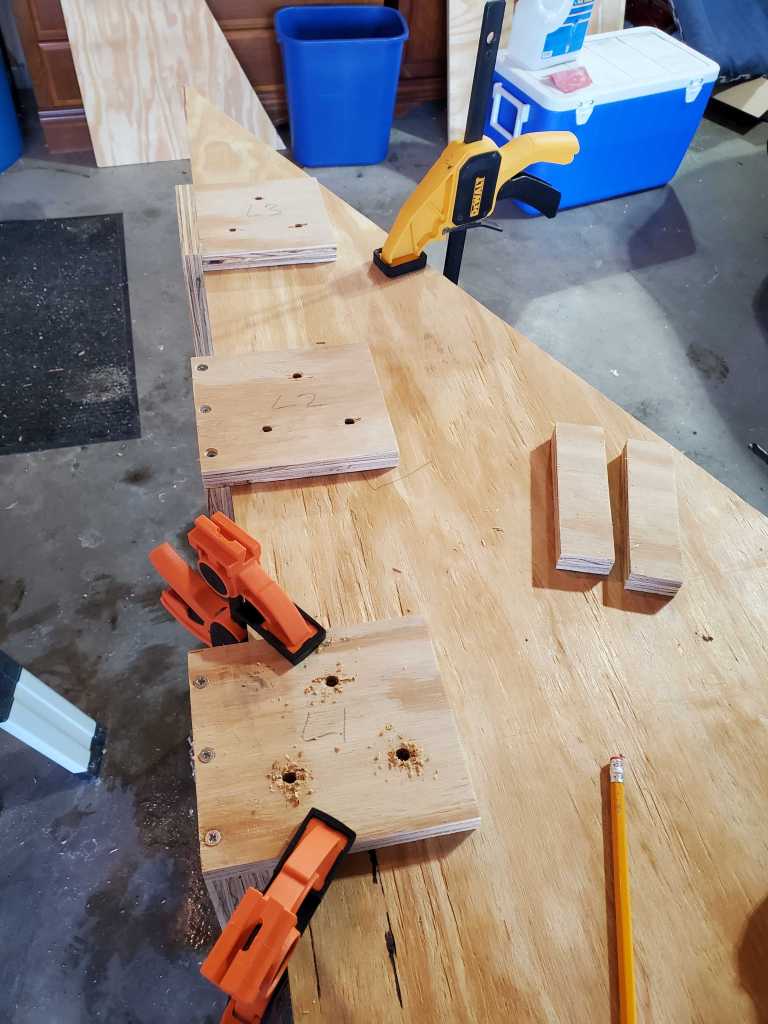
Once the brackets were drilled, they were aligned on the triangles to drill the through holes. Before drilling into the triangle piece, a piece of plywood was put in the bracket side to leave space for the other triangle. The brackets are marked so I can put them back in right order. The brackets are aligned to the shelf marks so that each triangle could be drilled and still line up with each other.

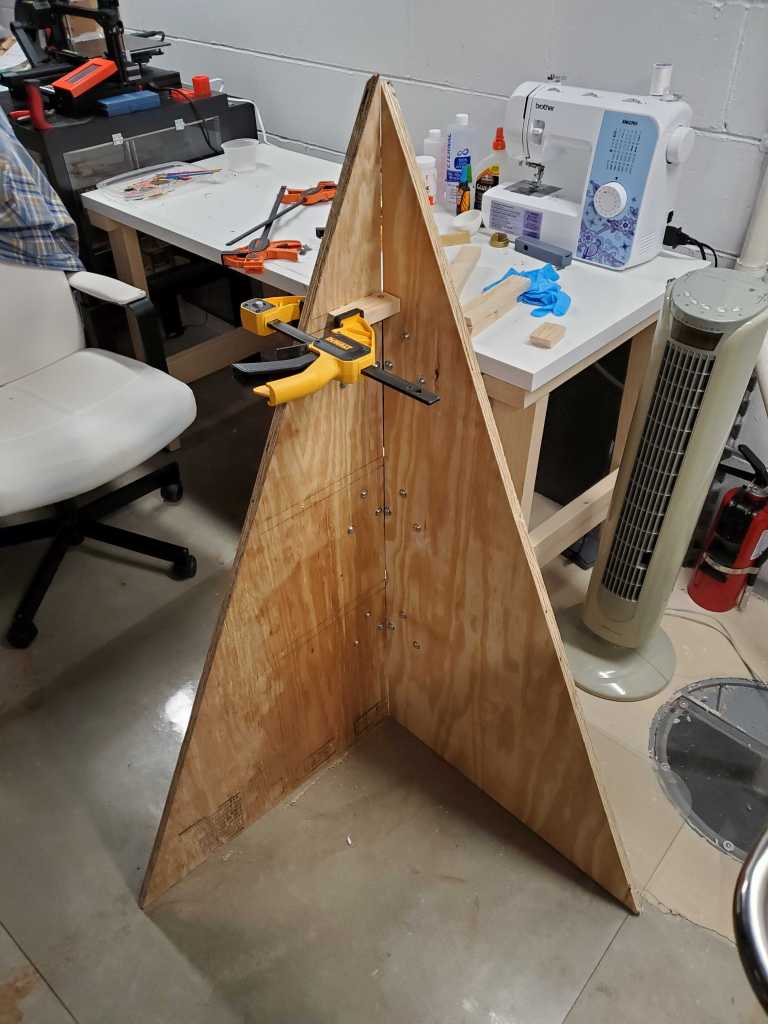
The two triangles are test fit together, with 1/4-20 bolts with a 1/4″ washer on the front, and a nut, lock washer and normal washer on the back. The fit was not as nice as I would have liked, but should not be too noticeable once it is all decorated.

The shelf supports were then cut from 1×2 boards, lengths: 4″, 8″, 12″, and 20″. One side of each board was cut with a 45° bevel cut. This was made to lessen the view of the board from the front. One of each pair of boards was then cut 1 1/2″ shorter than the other so than when butted next to each other in an L, the L will be the same side on each side.
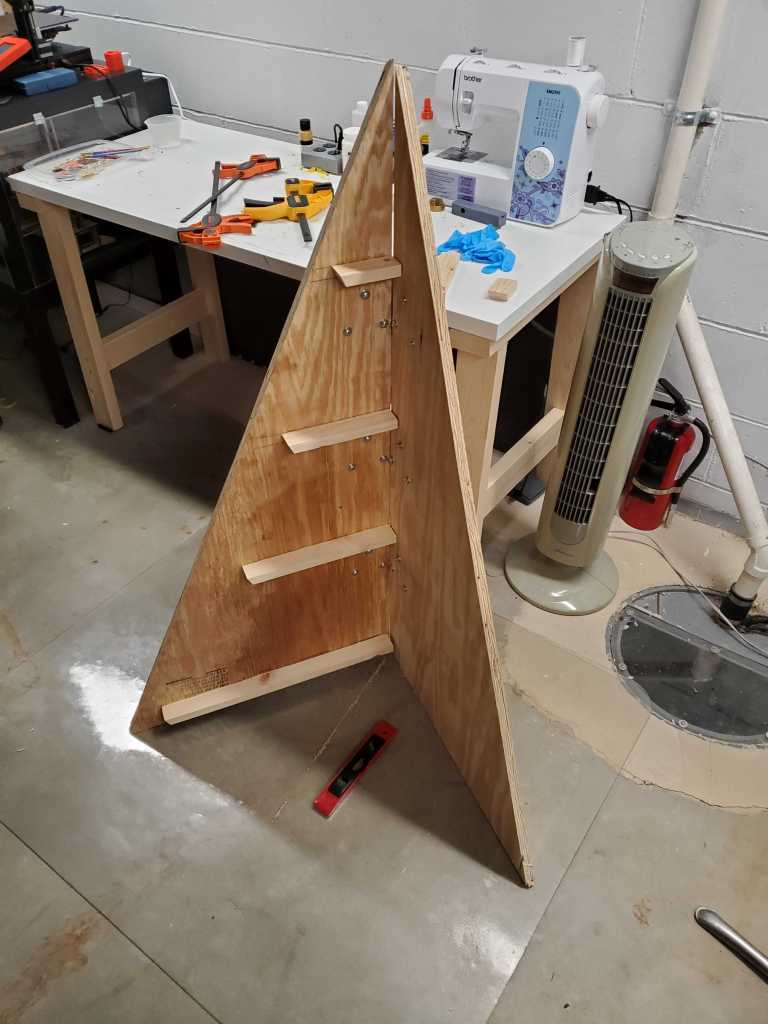
The shelf supports were then connected to the triangles with wood glue and screws in from the back. The wood screws in the back were probably overkill, but I didn’t have enough large clamps to use just glue and didn’t want to get out my compressor to nail them in. The shelves were then cut, each a triangle of 3/4″ plywood with sides measuring the same length as the shelving supports.

Before the final assembly, all were given several coats of Satin White spray paint. This was quite a challenge in the Minnesota cold. I set up a spray area in the garage, quickly applied a coat, and brought them inside to a area with an exhaust fan to dry. Having a low amount of space to do this, this took way longer than it would have in summer! If I attempt this again, I’ll definitely plan ahead to paint in the summer.
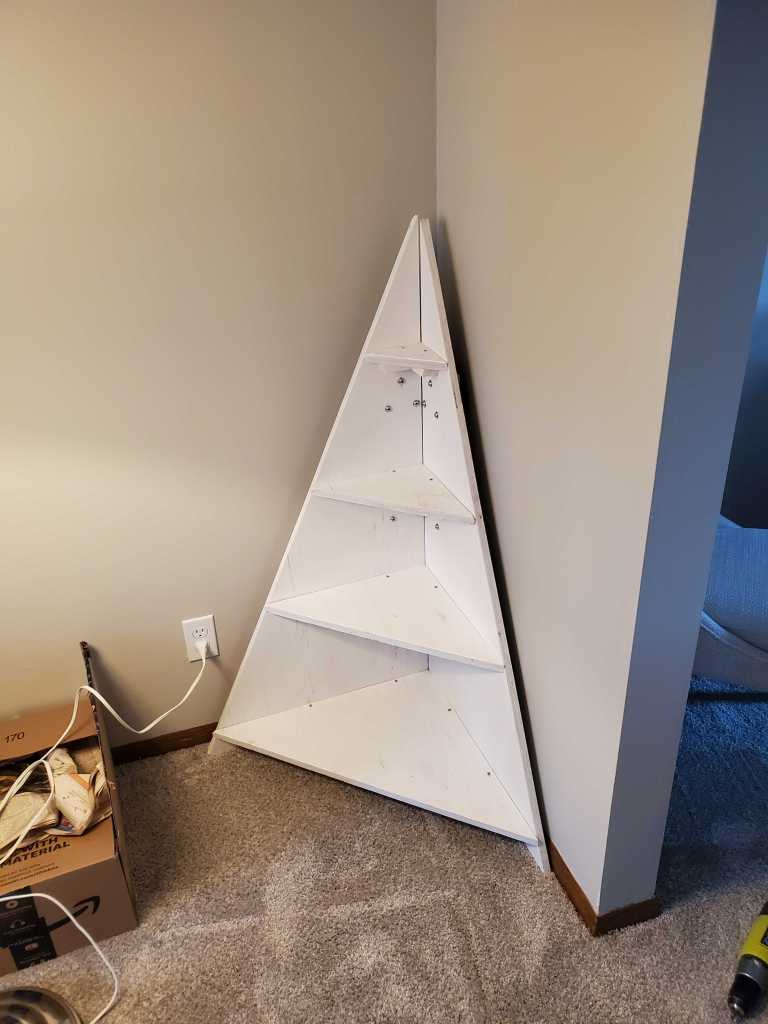
Once the paint is dried, the triangles are bolted together again and the shelves placed on top. So they won’t fall off, they are each secured with two small wood screws. The shelf is then ready for a 4 year old to cover in LEGO!
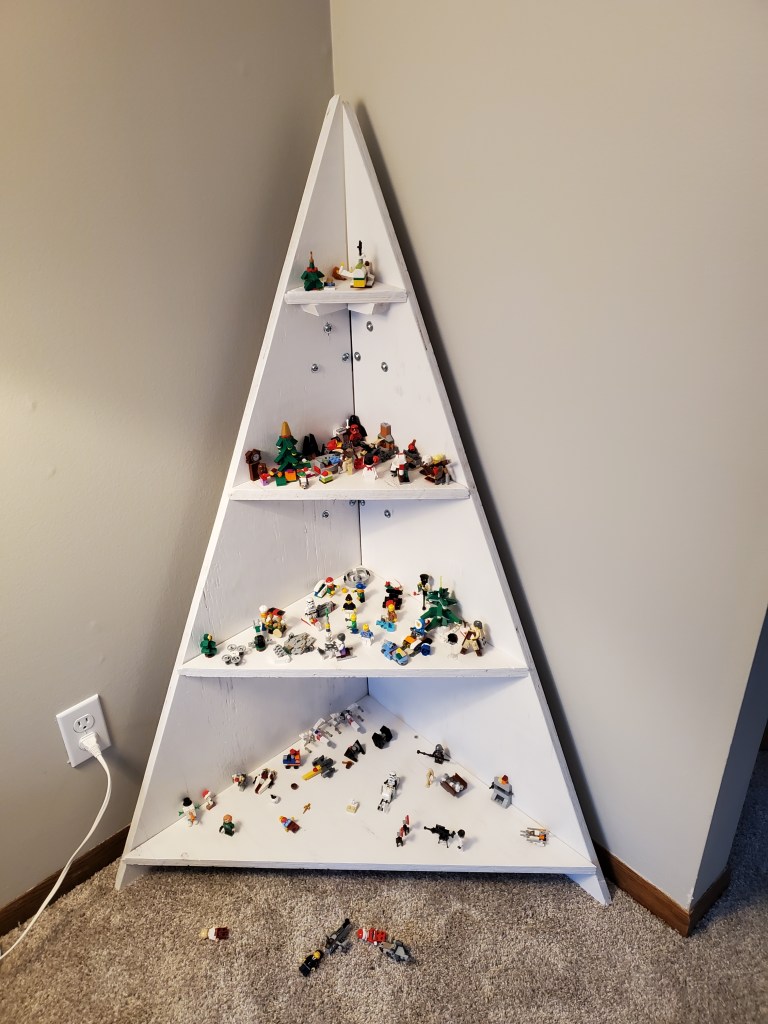
Overall, the display is a little rough around the edges, and I hope in the future to make another one. 4 feet is fairly short looking on the wall as well, I think next time I will make it at least 5 feet tall. The screws and bolts look harsh against the white paint, I need to countersink the bolts in a bit to make them less intrusive as well as tint them with a little paint. For the speed in which I was able to put this together (got it done a few days before Christmas), I’m pretty happy with how it turned out. Before next year I also hope to get some acrylic platforms for all of the LEGO starfighters and spaceship to fly on.

Response to “Christmas Tree Display”
[…] a Sacred Realm, I had to whip together a display case for it! I got some leftover wood from my Christmas Tree Display project and cut out a quick mitered box and glued it to the plywood frame back. I barely had enough […]
LikeLike