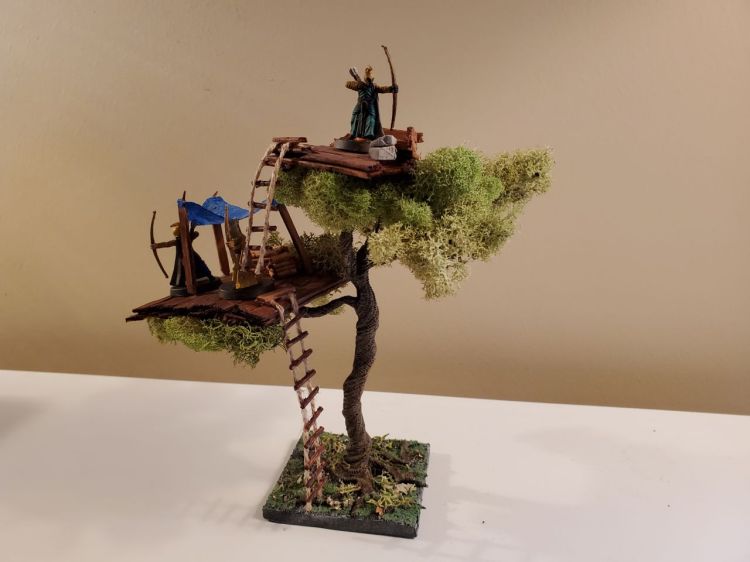
One of the best resources for increasing my skill in creating tabletop terrain has been participating in the monthly terrain contests at www.encounterterrain.com. January’s contest theme was “shelter”. I had made a small tree a few week prior, so after playing with a couple different ideas I decided on a large scale tree with a fort built amongst its branches.
The build:
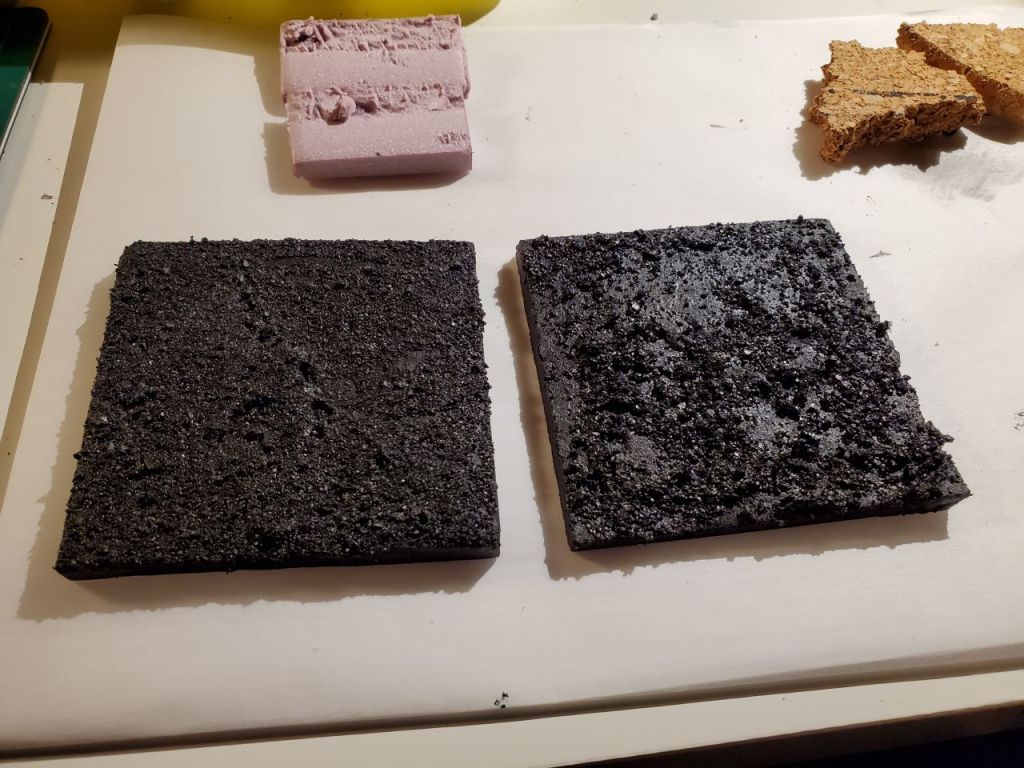
I started with a 0.25 in piece of insulation foam that was cut to be 3 in x 3 in. To aid in modularity of my terrain, I like to keep my pieces in multiples of 3 in. I covered the base with a mixture of PVA glue, black acrylic paint, and 3 different sizes of sand and gravel, then thinned down with some water.
The Tree
For the base of the tree, I used Encounter Terrain’s pipe cleaner tree method (check here for the instructional video):
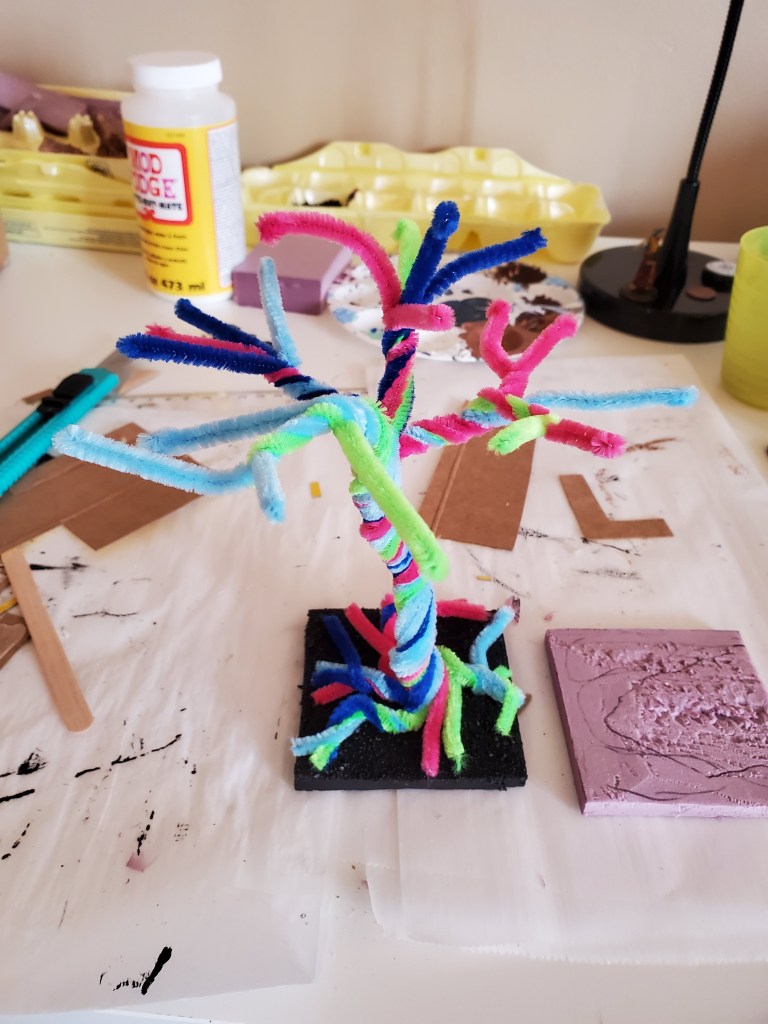
First, take a bundle of pipe cleaners and twist them together to form the trunk. Then take the ends and twist them together in smaller bunches to get the roots and the branches. Bend them and spread them out so that the tree will stand on its own.

Take either a lighter or a heat gun to melt the pipe cleaners, this will form a hard plastic shell that will take paint easily, as well as still being pliable.
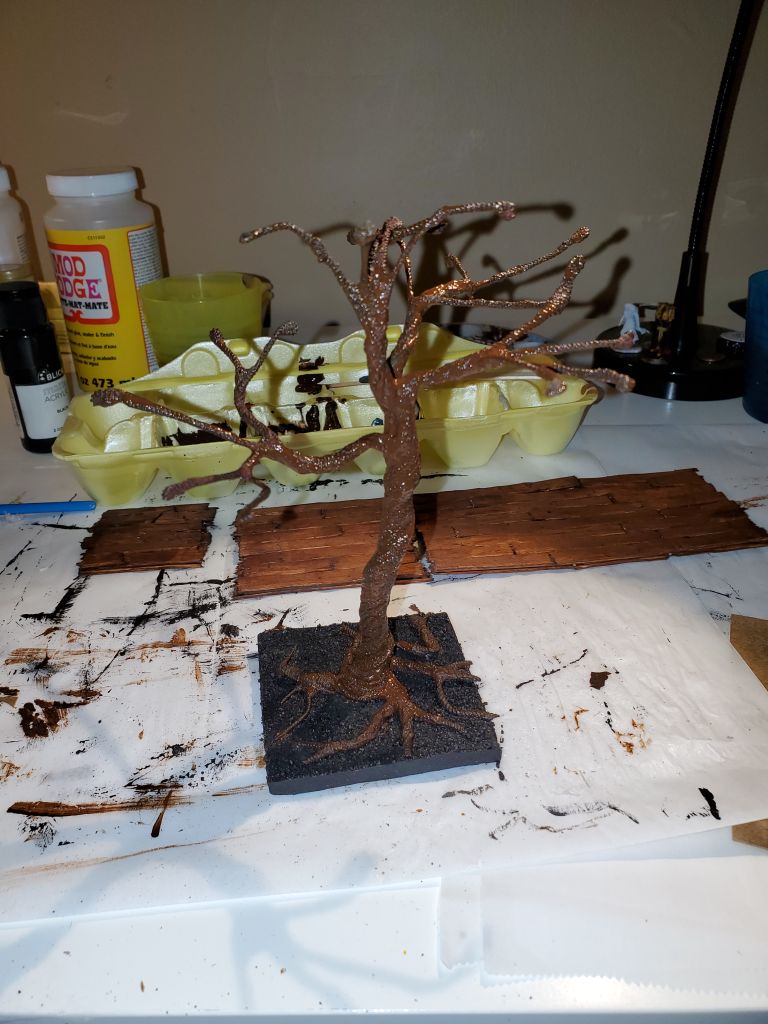
I secured the tree to the base with liberal amounts of PVA after the roots were bent so that the tree would fit nicely by itself. After the PVA dried, I used a small amount of superglue to glue down a few stray roots. After the glue dried I painted it with a dark brown thick basecoat. The wires in the pipe cleaners provide a nice texture that doesn’t need too much help.
The Fort
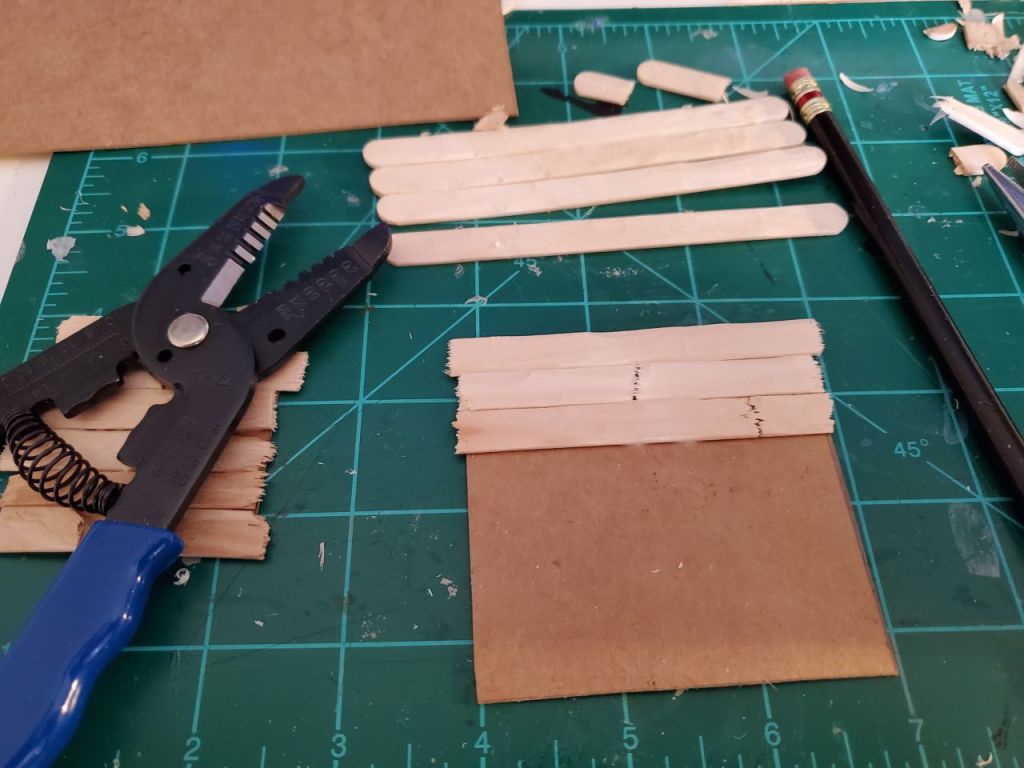
I cut two pieces of cardboard from a cereal box, in 2 in x 2 in and a 3 in x 3 in squares. For the wood, I took wooden craft sticks and roughed them up by running a utility knife along them, creating groves and scores and blemishes in them. I then used neednose pliers to crack them to fit the cardboard, securing them with PVA.
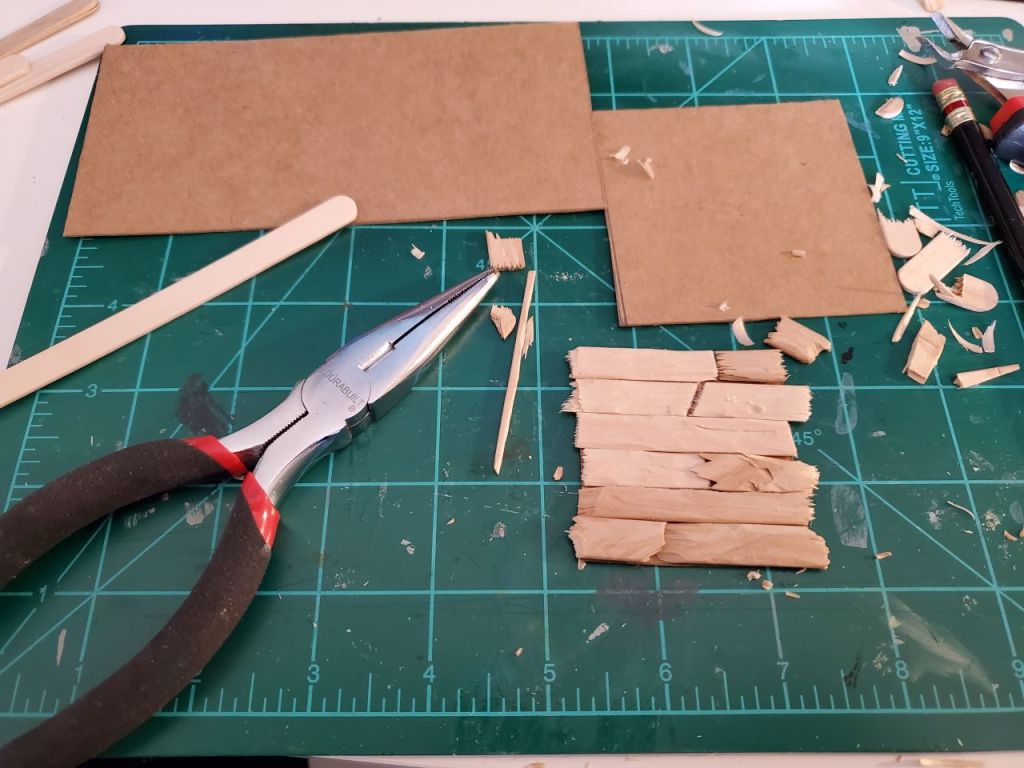
Vary the size of the sticks and the roughness of the cut to give it a very organic look. Since the platforms are going to be suspended in the trees and be viewed from above and below, I glued the wooden bases on the top and bottom of the cardboard platform. In hindsight, if I were to repeat this, I would forgo the cardboard, and use a few crossbeam craft sticks to give it a more realistic structure. The platforms are then painted with a wash of brown paint, very heavily diluted with water. This gives the wood an almost stained look very easily.
Once the platform paint is dried, bend the wire tree branches so that each platform will rest on all of them evenly. The platforms can then be secured with superglue.
The Foliage
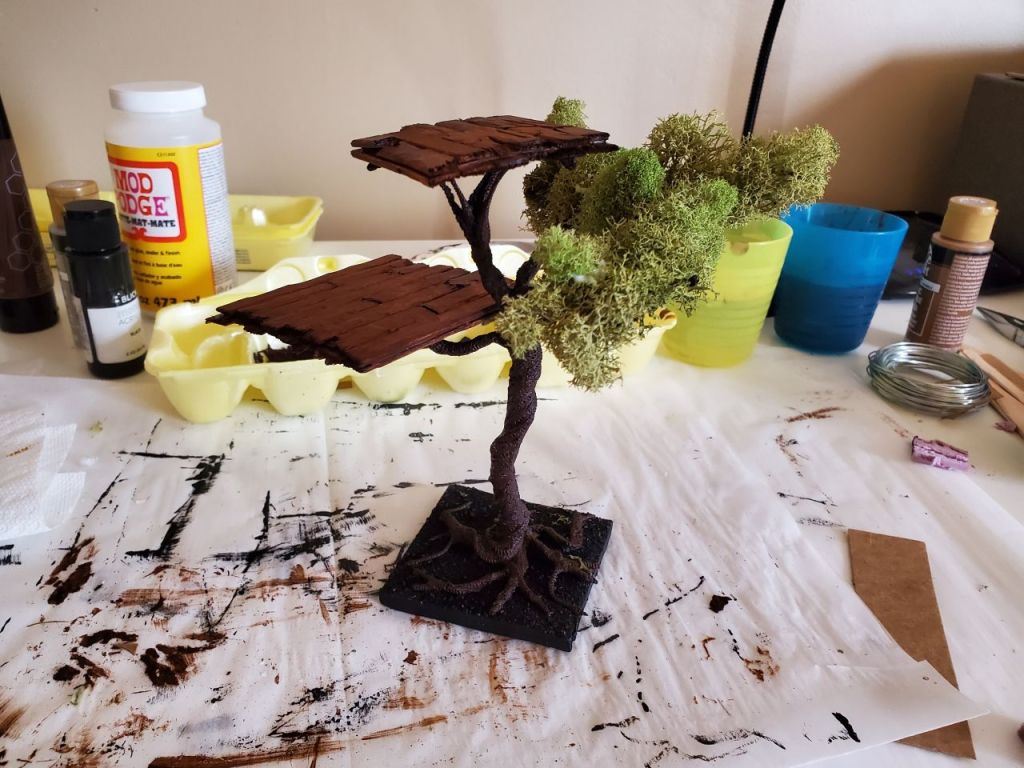
The foliage I used is from a sample of decorative moss found in craft stores, similar to this one. The moss is pulled into appropriately sized clumps and then secured with PVA. While the glue is drying, it may seem that the moss’s hold is shaky, but they hold up well once the glue is dried. The branch without platforms easily had its branches secured.

For the platform branches, I needed to get a little creative to secure the rest of the moss.
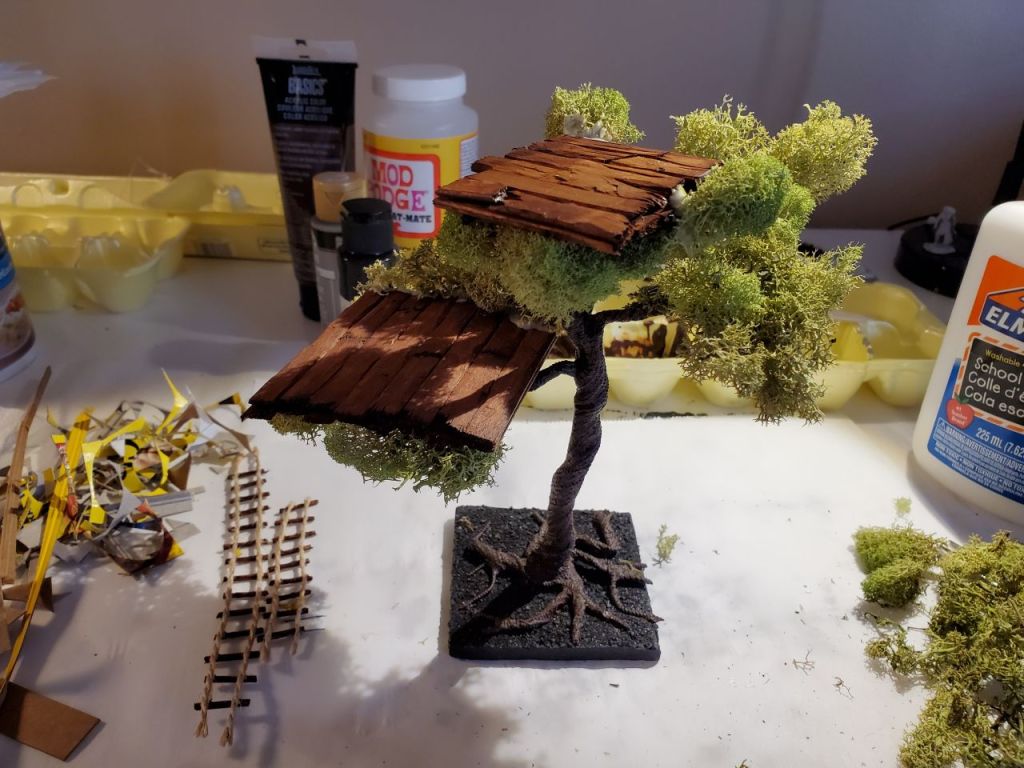
Once the base foliage was added, a few more pieces were added to the top to fill out the tree.
The Rope Ladder
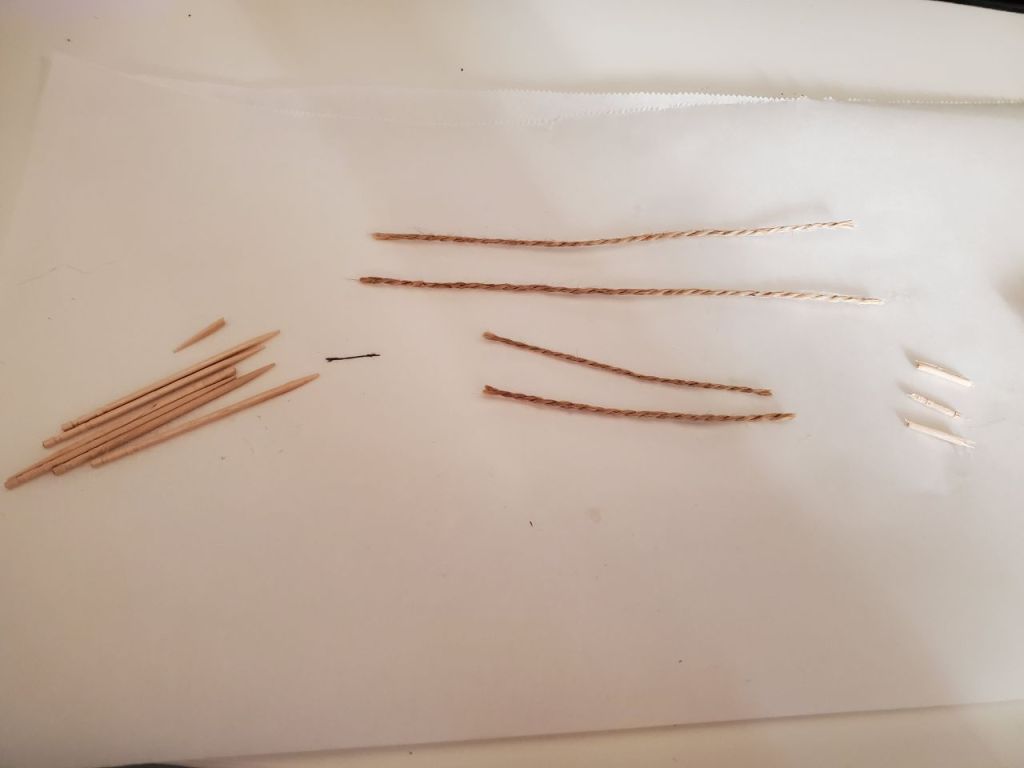
To make the rope ladder, I started by cutting a few pieces of twine to the height of each platform.
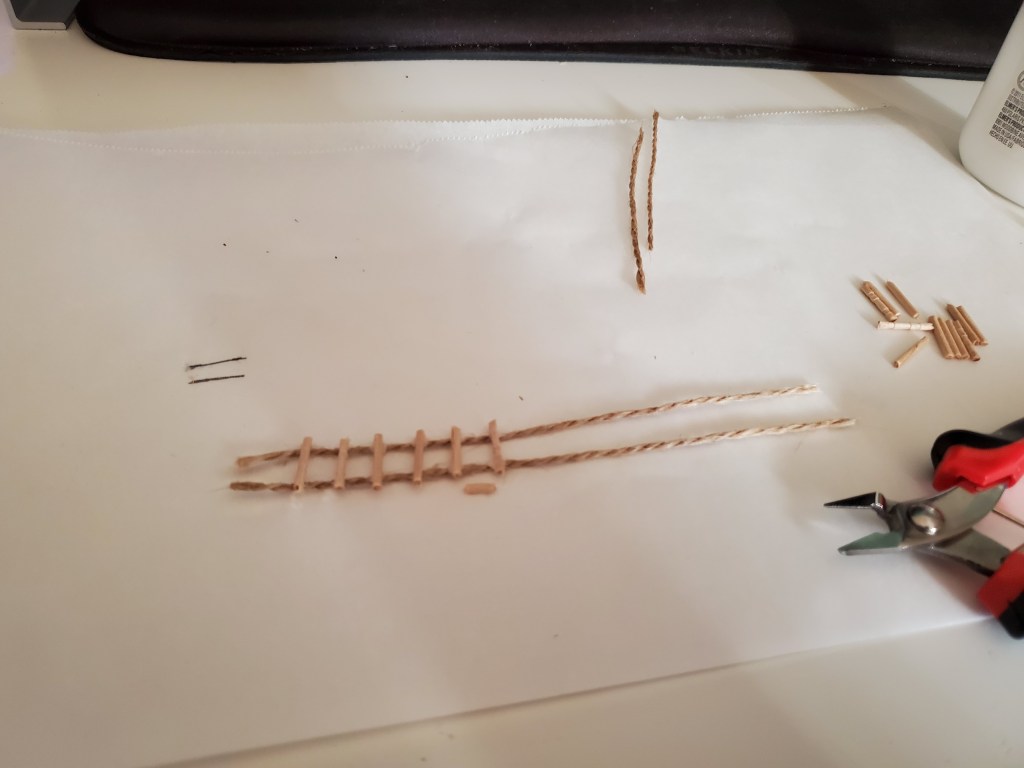
Using plain toothpicks, I snipped them to the right width and secured them with PVA.
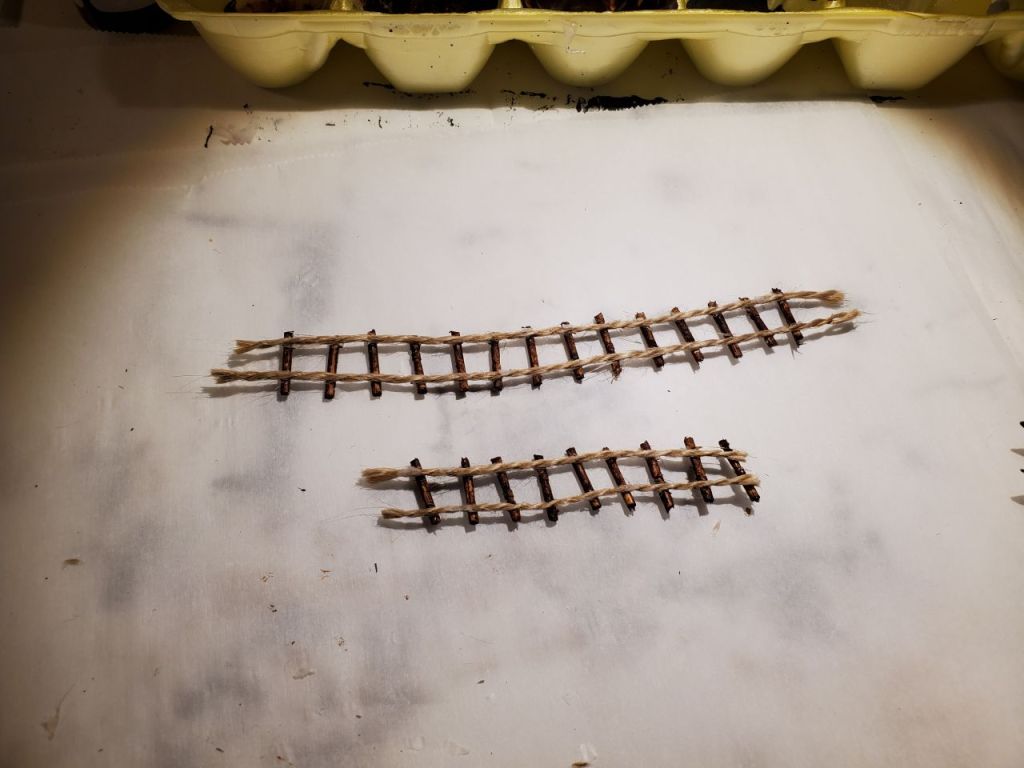
The bars were then “stained” using the same wash as the platforms.
Finishing Touches
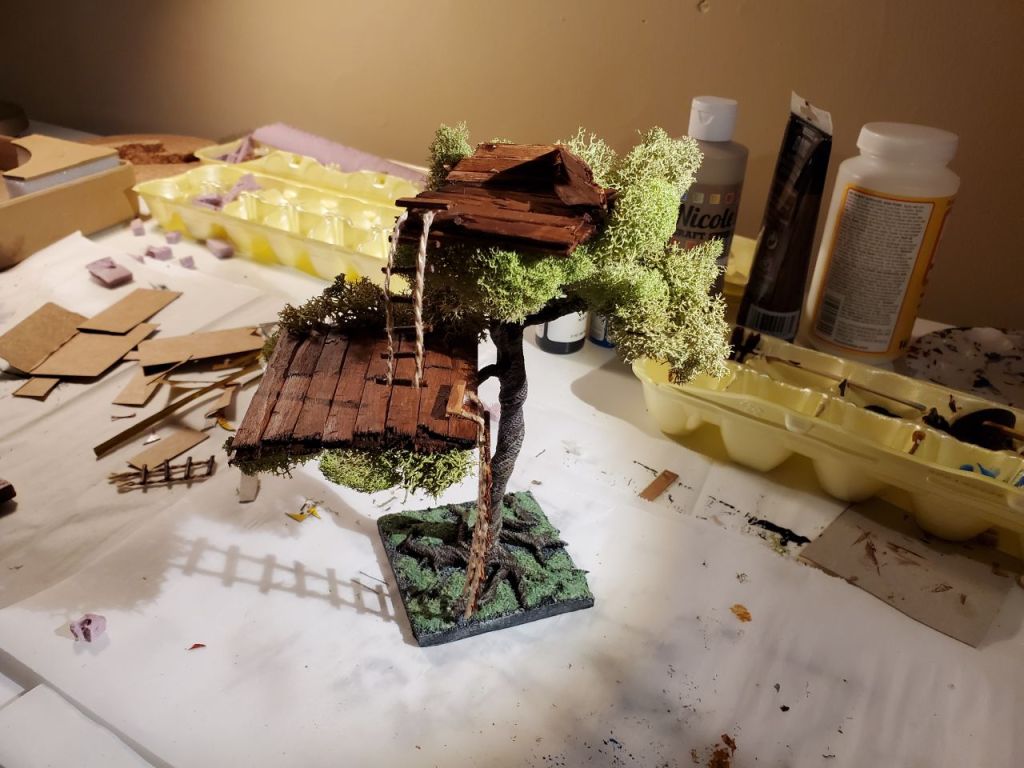
The rope ladders were secured with a little superglue. I added a baricade to the top platform by securing a few pieces of the sticks on their edges with superglue.
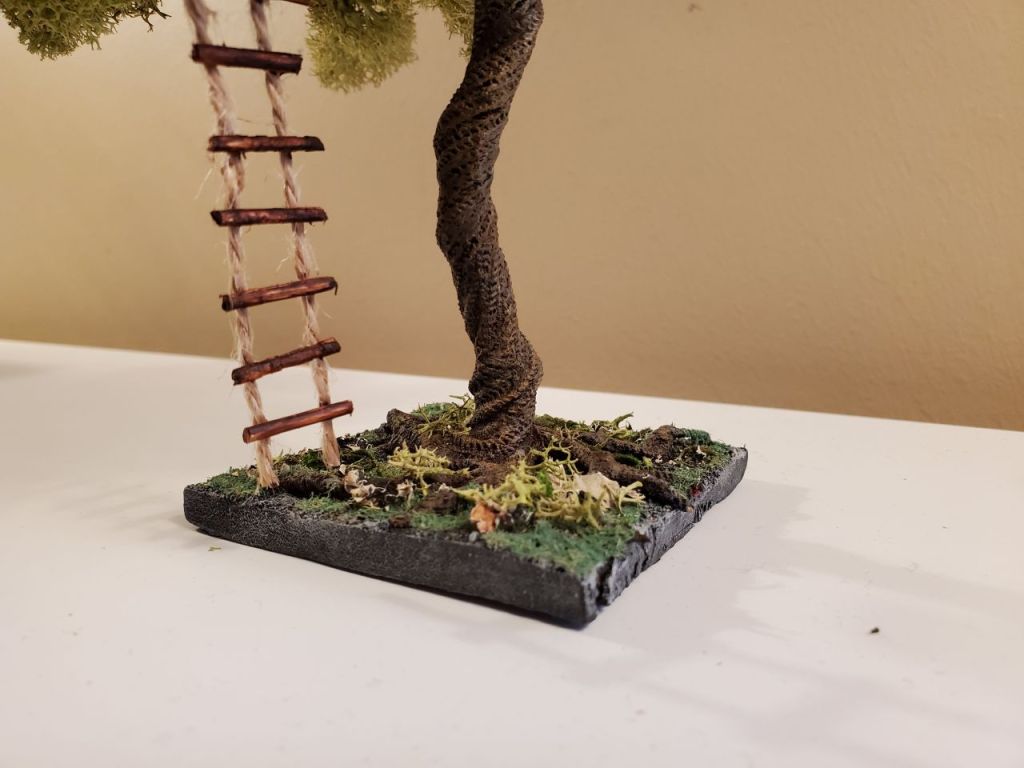
Simple flock was added to the base to cover most of the ground and the tree truck was drybrushed with a few shades of light brown. A few scraps of moss were added on top of the flock to give a forest floor appearance.
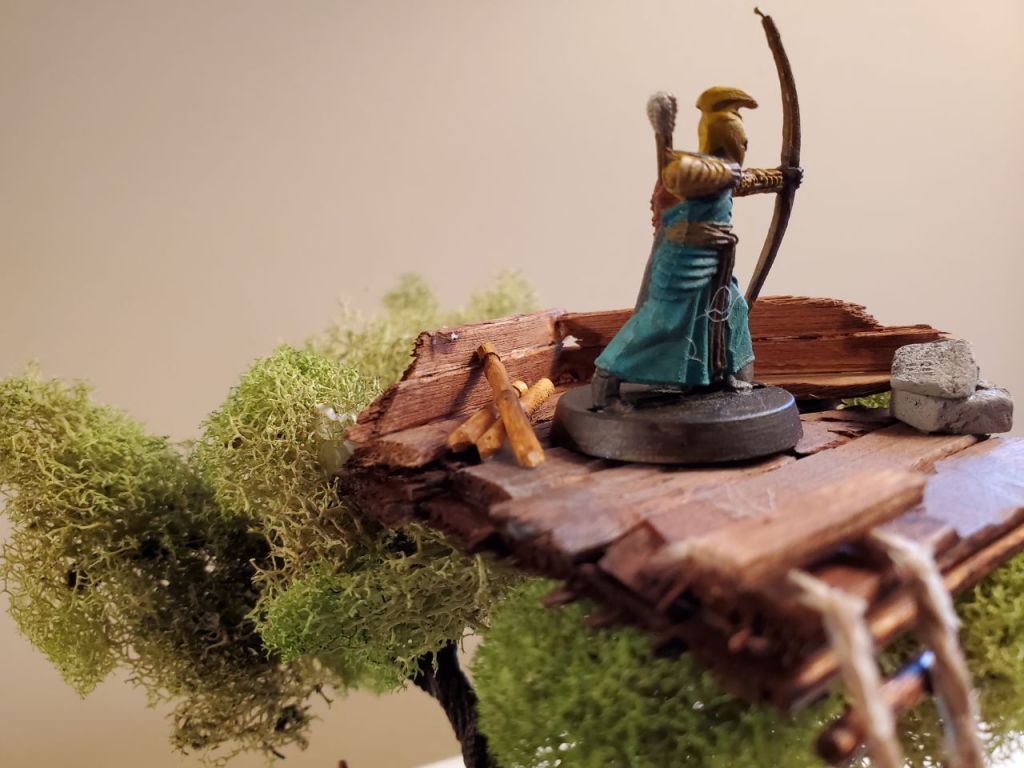
To the top platform, I added a small stone container carved from insulation foam as well as a few toothpicks, lightly stained, carved into stakes.
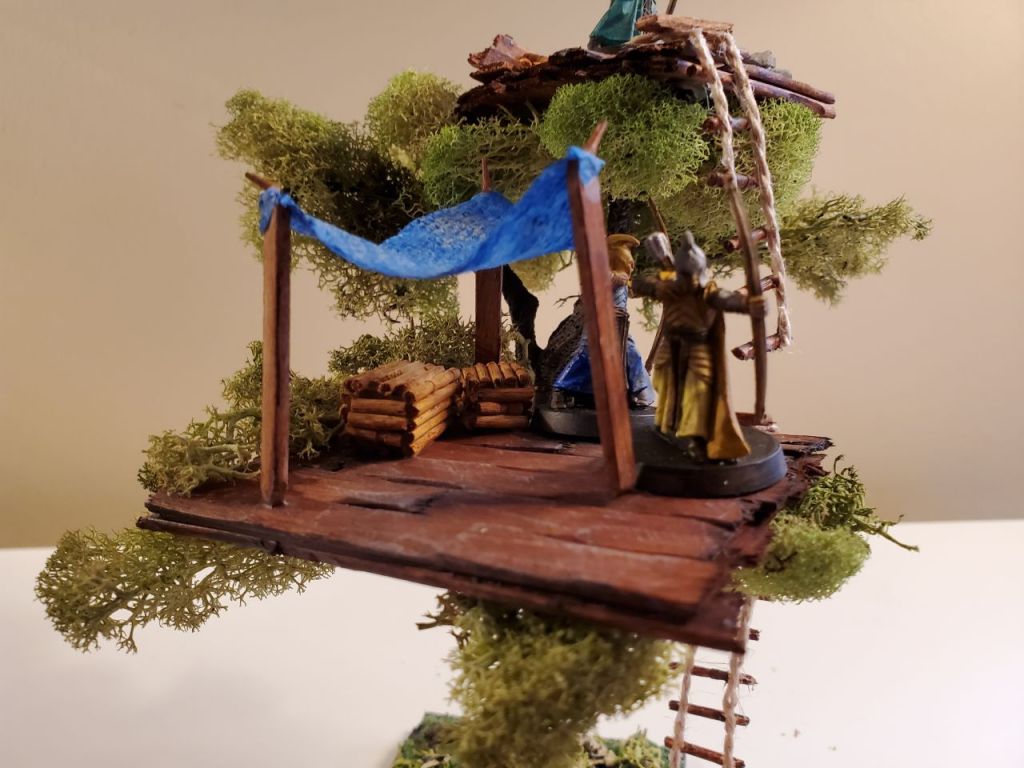
Crates were made for the middle platform by cutting small foam rectangles and gluing cut toothpicks to each side. To create the canopy, I cut slivers from the craft sticks, and stuck them into a foam piece to secure them. I then cut a triangle of paper towel, dipped into Mod Podge and stuck it to the tent poles. After drying, the towel becomes hard enough to paint. Each of them is secured to the platform with a dot of PVA.

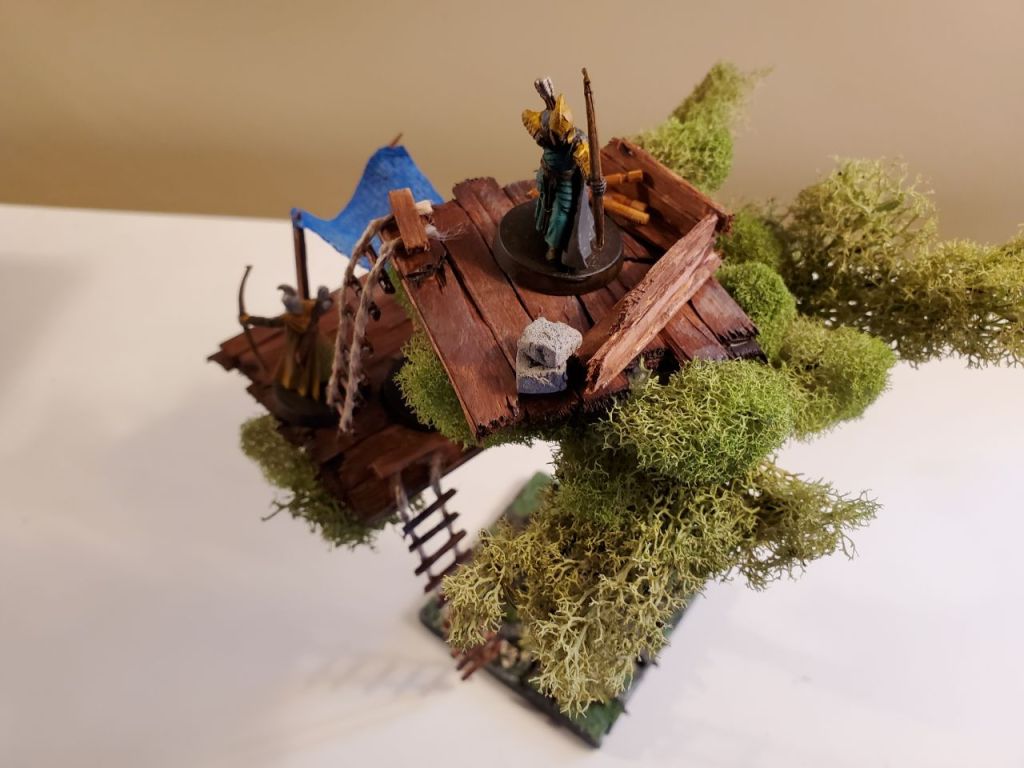
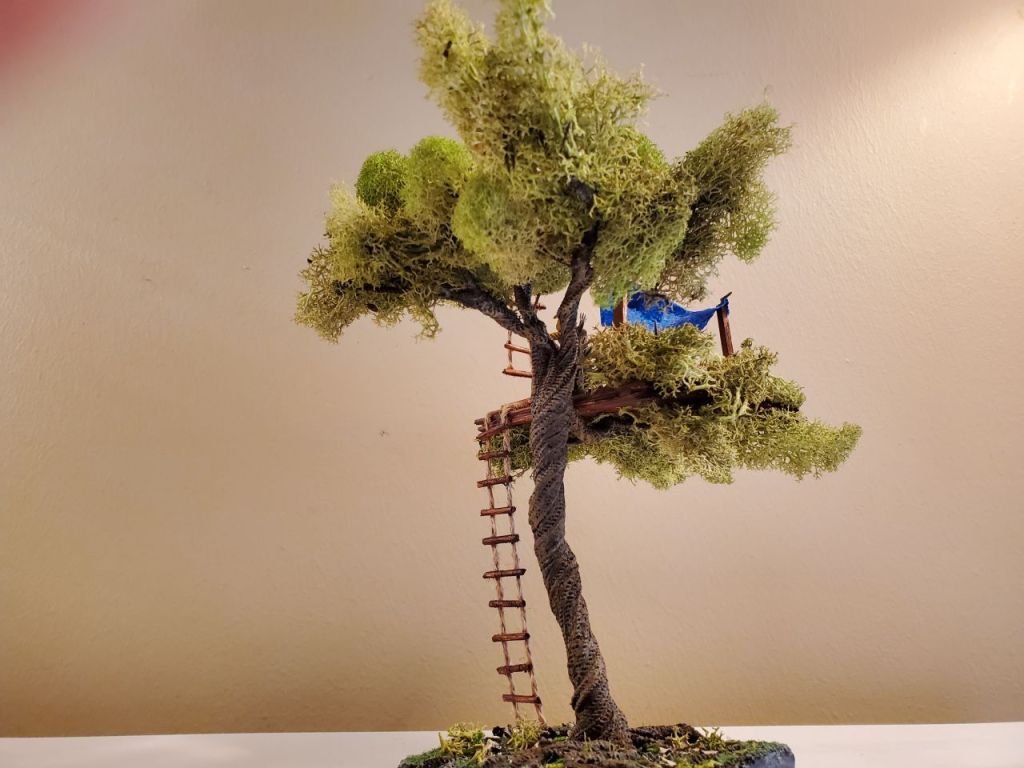
The finished piece, with a few elves on the lookout added to complete the look.
