Whelp, so much for the weekly updates for the past few months. While most of my time has been taken up with huge house renovation projects, prepping for a new baby, and having a new baby, my lack of updating has not meant that no project work wasn’t getting done! Here’s a recap of what I’ve been working on for the past few months:
386 Full Tower Restoration


This 386 tower had been sitting unused in an old high school friend’s father’s garage until he was tasked with emptying it. Having a burgeoning interest in restoring old systems, I eagerly offered to save it from being recycled. It had sat in a garage for a long time, but overall the system looks to be in fairly good condition. It must have been quite the system back in its day, rocking a 5.25″ floppy drive, a 3.5″ floppy drive, a CD drive, a tape backup drive, as well as a modem.
Aside from some dirt and discoloration, there were two main problems that needed to be addressed:
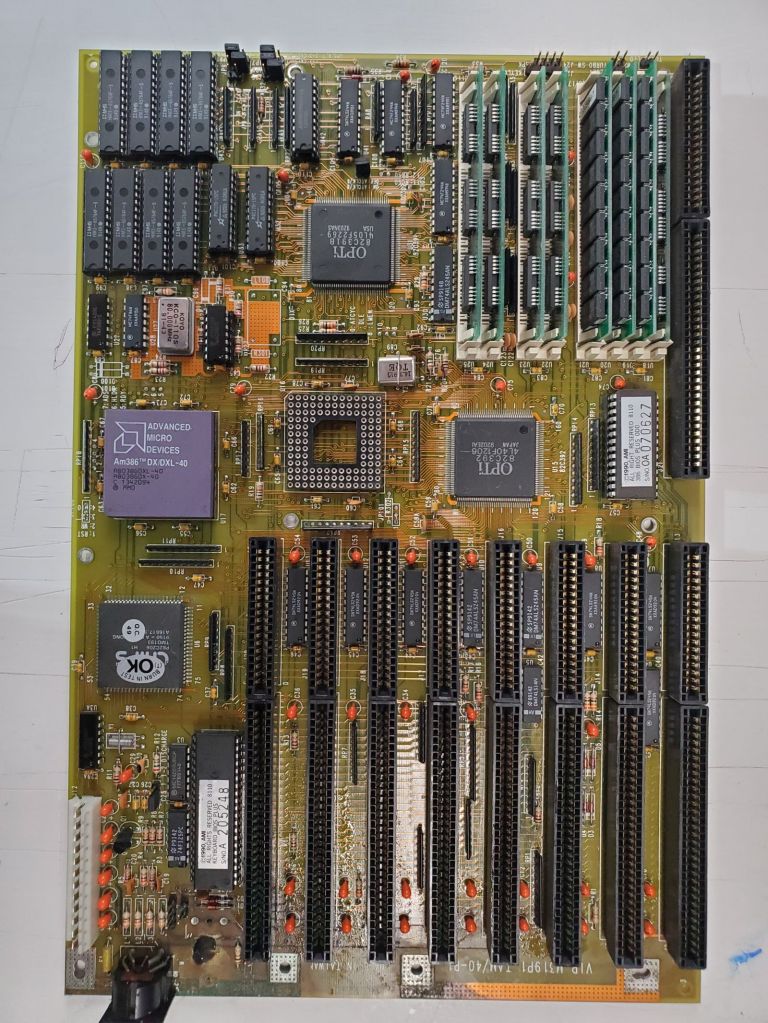
1. The motherboard sported a Ni-Cad backup battery (which had already been removed by the time this picture was taken) in the lower left corner of the board. Considering it was installed in early 90s, it has long outlived its shelf life and leaked all over that corner of the board. The corrosion needed to be neutralized and cleaned and a new battery installed.

2. Sitting on the floor of the garage for 20+ years did a number on the bottom of the case – there is a significant amount of rust that I would like to clean out before I make use of this case.

The motherboard cleaned up fairly easily – I used vinegar to neutralize the battery corrosion and then cleaned off the corrosion with a fiberglass pen. Using a multimeter I probed all of the affected traces and pins and it initially appeared that there was no lasting damage.
Before tackling the case I decided to see if I could get the computer to boot. First I needed to test the power supply to make sure I didn’t blow the whole system when I plugged it in. All of the voltages checked out, but when it first plugged in, I could tell the PSU wasn’t turning on all the way – the fan only sputtered on and it wouldn’t power any equipment. The solution which took me too long to remember having heard once – older power supplies are expecting and need a decent load on them to be fully operational. The motherboard alone was not enough current draw to engage the power supply. So after grabbing a few of the drives and hooking them up to the power supply alone, the PSU spun to life and the motherboard powered up!

After testing a few things I quickly realized I would soon need some way to input into the system – the only input method on the motherboard was a 5 pin DIN connector, and I had no keyboard with that connection. So a quick trip to my favorite surplus store and a 5 pin DIN jack and a 6 pin mini-DIN socket later, I had a quick and dirty jerry-rigged adapter. The adapter is very simple as the two connectors use the same specifications, you just need to connect the 4 corresponding pins of the two connectors.

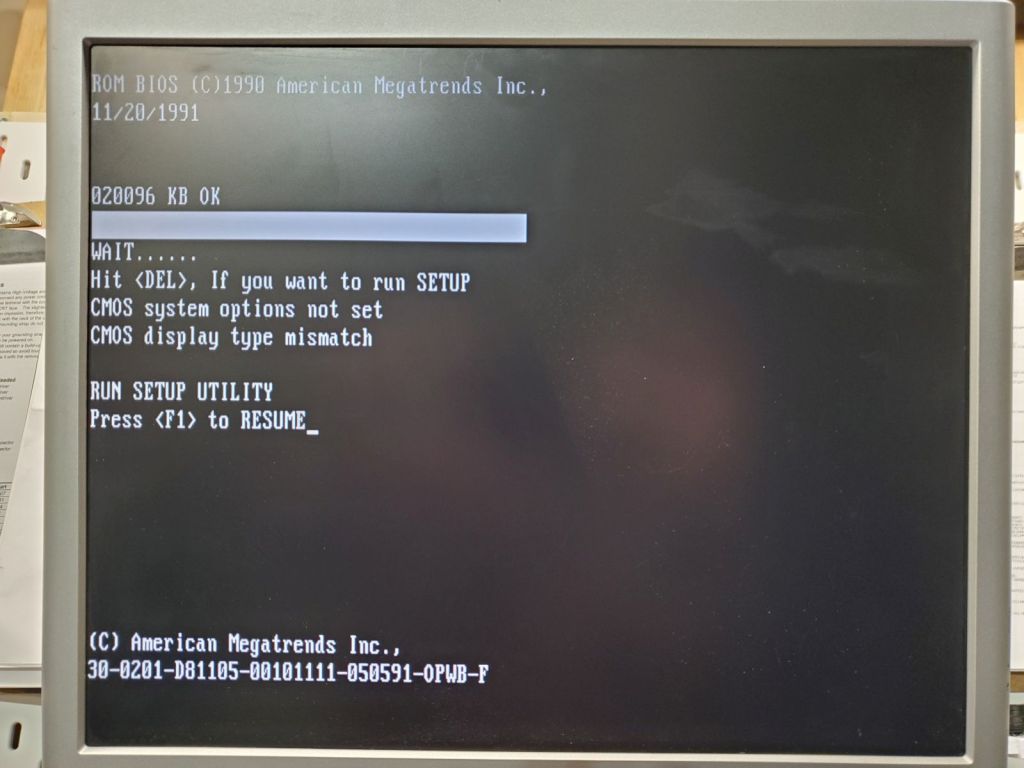
Plugging in the video card then gave me a BIOS screen! Next steps will be to clean out the case, clean the other components, and connect everything back together.
Workshop Shelving
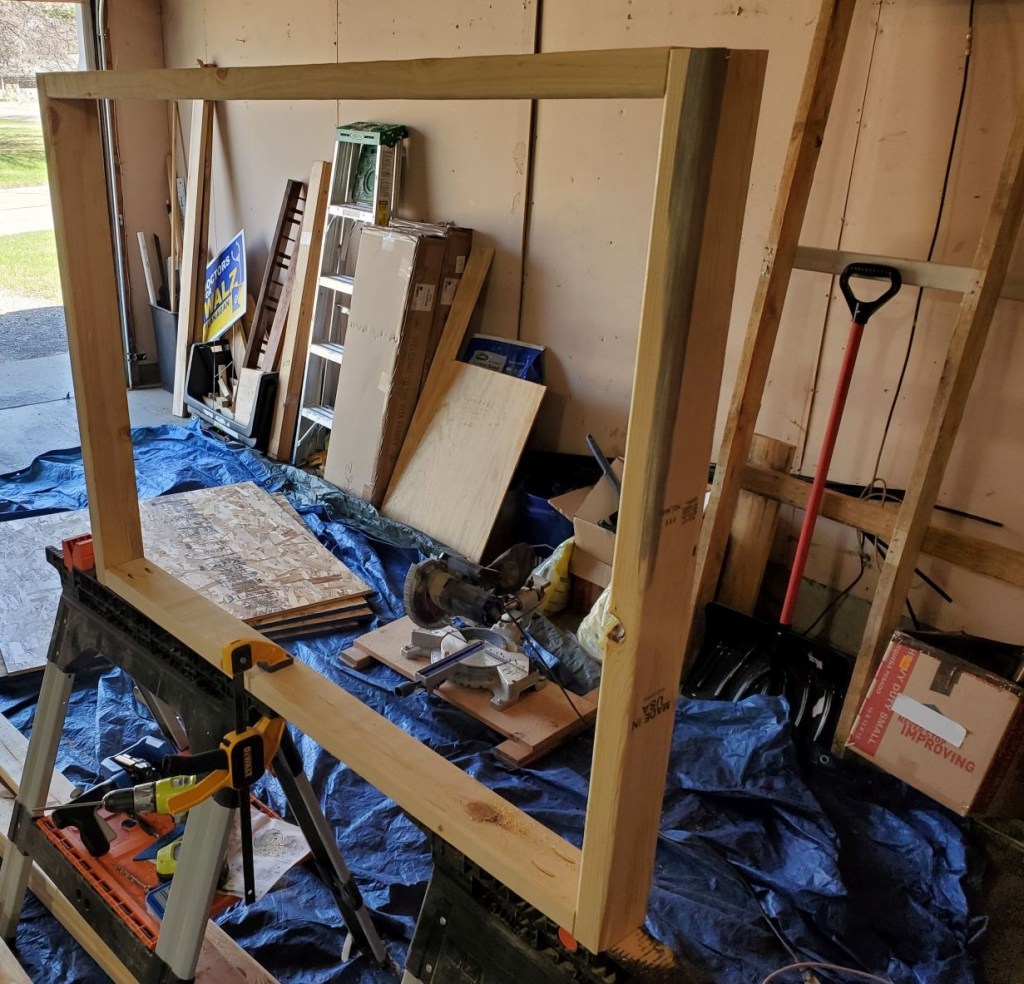
Needing a lot more organization in the workshop, I decided to take a few days a make some big, sturdy shelves for a lot more storage in the workshop. The basic design would be two rectangular frames that held up four rectangular frame shelves with large carriage bolts. First step was to make six rectangular wood frames from 2x4s with pocket hole screws.

Once the frames were built they were brought down to the basement and the two large side frames were propped up while the shelf frames were clamped into position. While clamped the holes for the bolts were drilled and the bolts installed.

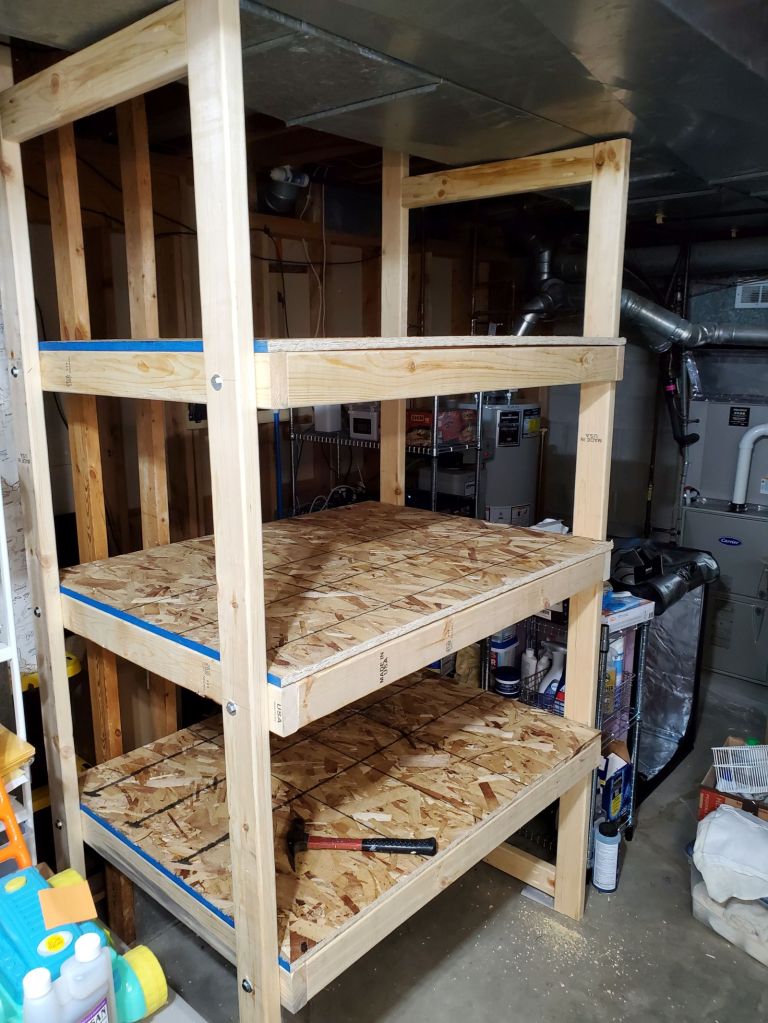
Once the shelving frames were installed, I cut some thick OSB to size and laid it on top. The OSB is fit snugly and the weight of the items will keep it secured. This allows for easy deconstruction in the furture if ever needed.
Old Oscilloscope Testing
I picked up a few very old oscilloscopes of unknown ability from the ReUse and surplus stores and have just began to test them out.

The Tektronix T932A was the first oscilloscope to be tested on the bench. I could only perform some basic testing, but it powered on fine, with a nice bright screen. Simple testing showed some nice readings but I’ll need to get some systems to do some more testing with.

The second scope to test was the Sencore PS 148. A significantly older scope, with the minimal testing I did with this scope I could not get a signal to show.

The vacuum tubes in the scope were glowing, but I’m guessing I’ll need to do some deep inspection of the scope to get it working.
Magnavox Odyssey Testing

I have had a Magnavox Odyssey 500 for a while, but have not had the components to connect it to any display that I have. That was fixed when I found a tiny black and white portable CRT with an antenna input. The antenna input was a 3.5 mm TS jack, which I was easily able to rig a connection to the antenna output of the Odyssey. The Odyssey did not come with a power connection, so I had to rig up that as well, which was 9 volts through a 2.5 mm TS jack. The Odyssey powered on and displayed well on the little TV, but there is definitely a lot of work to do on it. The controller potentiometers are very rough as well as the switches. Some of the controls are stuck, leading to one player continuously careening off the screen. Hopefully it’ll just need a good clean to get everything working again.
Brewing a Belgian Dubbel
For the last big project, I brewed my first batch of beer in many years, a Belgian Dubbel.

I use a homemade mash tun made from a drink cooler with a mesh screen attached to a spigot. The mash water is heated on the stove and with an immersion circulator to keep it at the exact right temperature.

Wort is collected in a 6 gallon kettle and brought to a propane burner outside where it is boiled and hops and Belgian candi sugar is added.
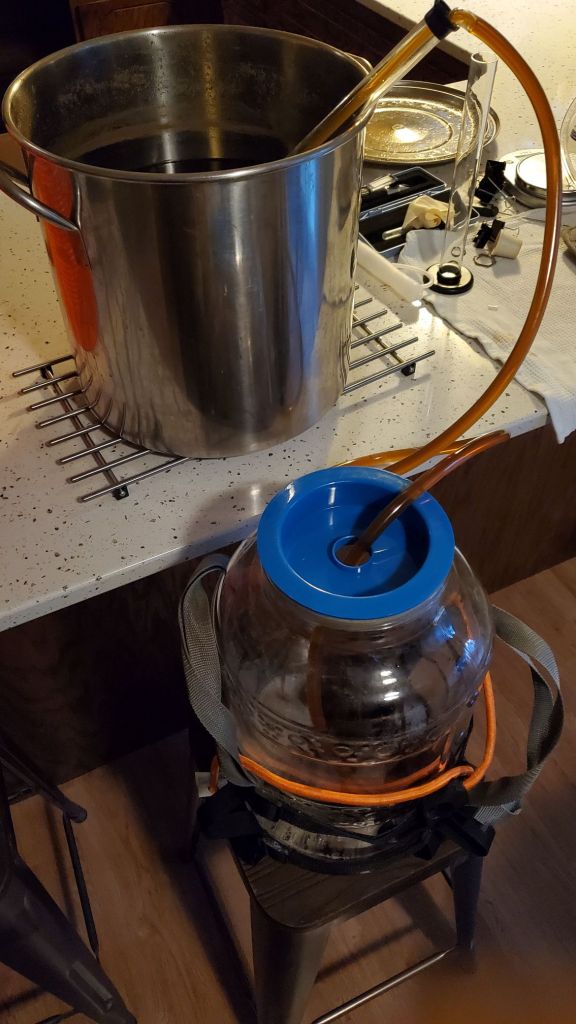
Wort is then cooled and siphoned into the fermenter while the yeast gets ready. This time I used two smack packs of a Belgian yeast.

Fermentation went nice and vigorous for a few days, which was relieving to see based on the weak showing from the smack packs. I let it go for a week and a half until fermentation was definitely completed.
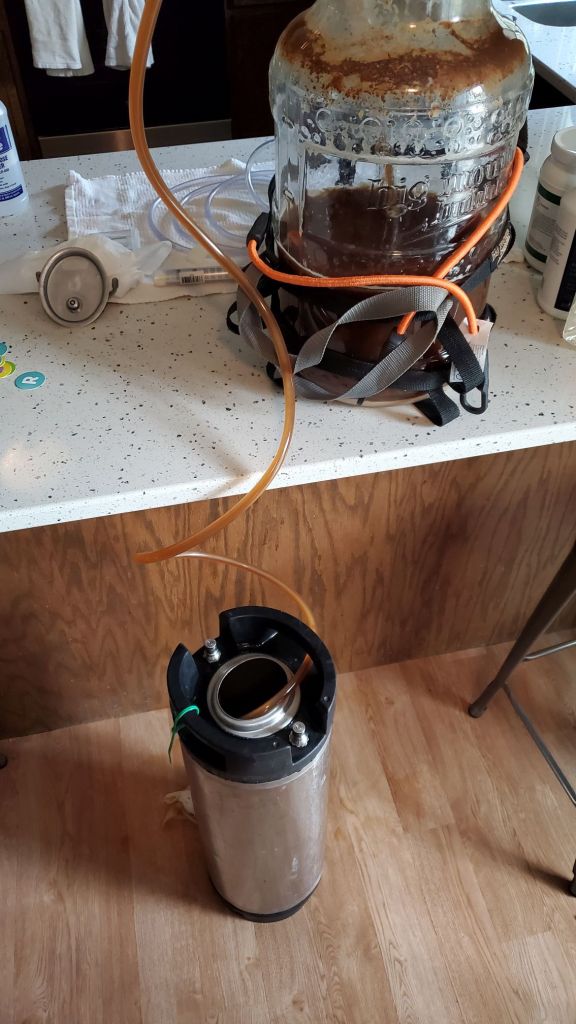
Beer is in the keg now and just waiting to be carbonated!
Until the next project updates
Fingers crossed for more consistent updates and a lot more project progress each week!
