Right in the corner of my workspace in the basement, between my two workbenches, sit our sump pump, battery backup, and water main. Not only is it a bunch of space I can’t make use of, it was also a large space I wanted to hide from view, but still be accessible, while trying to squeeze some workshop value out of it. Being about 4 feet between the workbenches, it was the perfect place to put in a massive rolling chalkboard. Being a former math major and teacher, I have always been rather partial to writing on chalkboards as a way to visualize my thoughts and plans. To me, there is nothing quite like the feeling and sound of chalk on a board while writing.
The Frame
Since this was going in my unfinished workshop, hiding a sump pump, it did not have to be fine woodworking, but had to be solid and easily movable. After browsing my options in the lumber aisle, I decided to make the frame out of 1x4s and the board out of 1/4″ plywood.
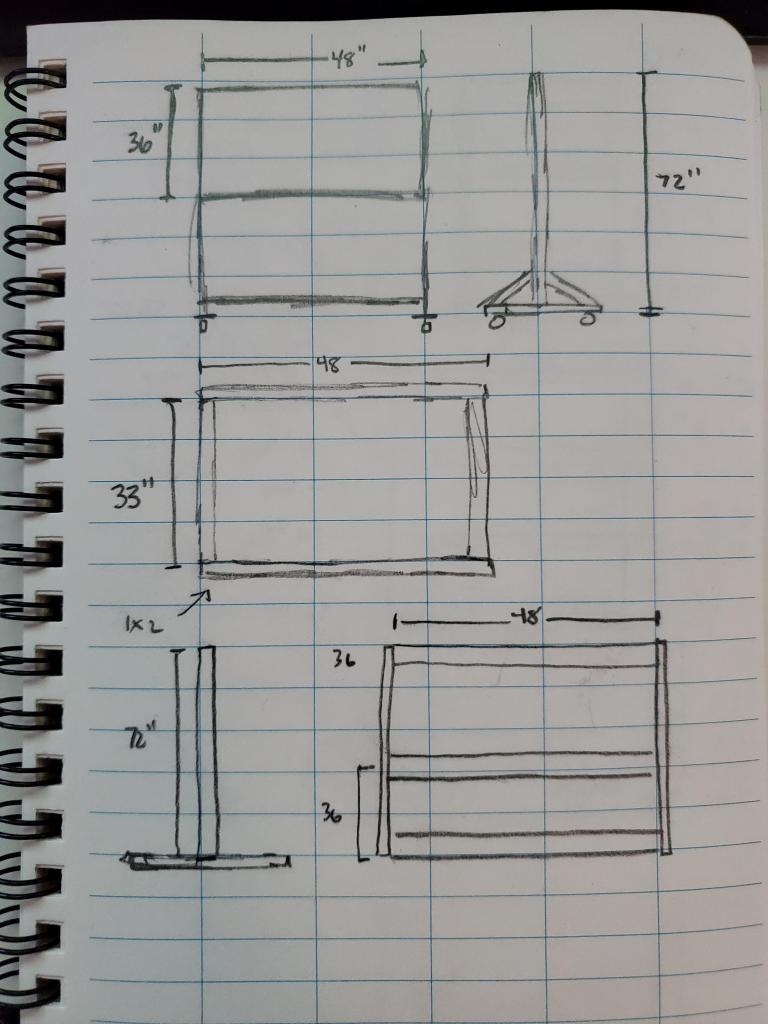
The frame would be simple, cross beams screwed into the sides of two vertical pieces, which rest on flat boards with casters, with a few support beams added so it won’t be too wobbly. I original hoped for 3′ x 4′ sheets of plywood to minimize the number of seems on the board, but once I got to the hardware store, they already had 2’x4′ cut, so I opted for three of those instead. In the end, I think this was the better choice because this forced me to add more crossbeams which makes the drawing surface much sturdier.
First step was to trim the boards up so they were all the same length. The crossbeam boards I got from hardware store were 4′ boards, but they are all a little bit different length so you need to trim them to make sure they are all exact. The vertical boards would be okay if they weren’t the exact same height, so I just left them.

Next step was to mark out all of the screw connections and drill the pilot holes. I laid out all the boards and calculated where to drill the pilot holes.

I did some calculations to make sure all of the boards were spaced evenly. Since I didn’t not cut and trim all of the boards, it was important that I measured everything from a single starting point so all of the sides would match up .

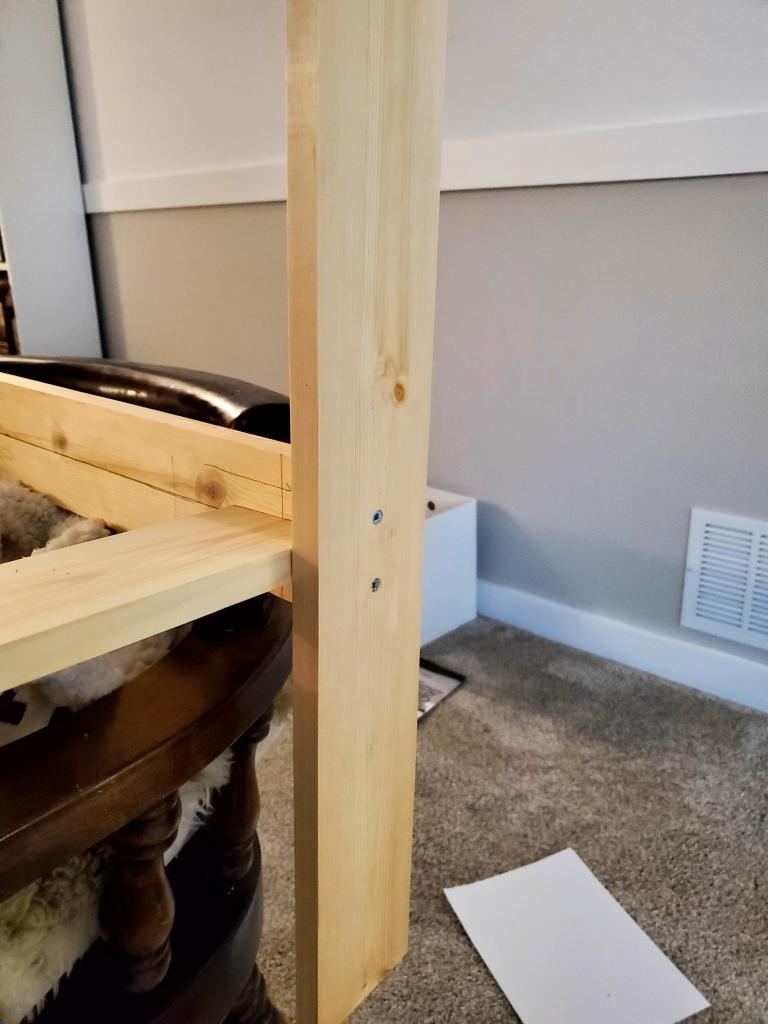
I took extra care to take my time with marking and drilling the pilot holes to make sure everything lined up. You can really notice with how smoothly everything came together a difference compared to previous builds where I did not take nearly as much time marking and measuring first. Once the pilot holes were drilled I drilled countersink holes as well so everything would fit flush, then I started screwing everything together.

Once the frame was complete I cut two more 2′ 1×4 boards to serve as the feet. 2′ was as small as I could comfortably make them without being sure the board would tip over, but the space in the workshop really didn’t allow for much bigger. Luckily, at the end of it all the 2′ feet work out just fine for supporting the board. I countersunk the screws and secured the feet to the frame through the bottom.

With the feet on, I cut four 1′ boards to serve as diagonal cross braces for the frame feet. I cut them with 45 degree miters.

I then drilled pilot holes through them perpendicular to their new end grain.

I did not drill a countersink for these, which was a mistake because in attempting to screw one of them in, I completely split it. Luckily I was able to rescue it with a little wood glue and clamps.

Four caster wheels would be attached to the frame feet to allow to be moved around the workshop. Since they would be attached with bolts, I drilled the holes for them, but then waited until after I stained it to attach them. After the holes were drilled, it was time to stain. I used a Dark Walnut Minwax stain that I had left over from another project after I sanded the frame thoroughly (though you will note I did not sand the wood glued part or the areas where the price tags were enough).

Unable to been seen from the picture above, I ran out of stain before I could cover the whole thing, so the back crossbars are not stained. These will be covered with the chalkboard anyway, so it’s not really a big deal. Once the frame was drying, it was time to get started on the chalkboards themselves.
The Chalkboard
Most important part of a chalkboard is having a nice smooth surface to write on, so I first laid the three pieces of plywood out and sanded them with up to 220 grit sandpaper. Once that was done, I marked on the edges where I would want to screw the boards to the frame and drilled the pilot and countersink holes before I pained.

Once the sanding dust was cleaned off it was time to paint. I did three coats with a roller brush, lightly sanding in between. I took a chance by not priming the boards first, but they didn’t really seem to need it.

I learned after this that a foam roller brush is way better for chalkboard paint then the standard roller brush! If I’m unhappy with the surface after a while I think I’ll go back and sand the painted surface down a little and reapply another coat to see how much the foam roller improves it.
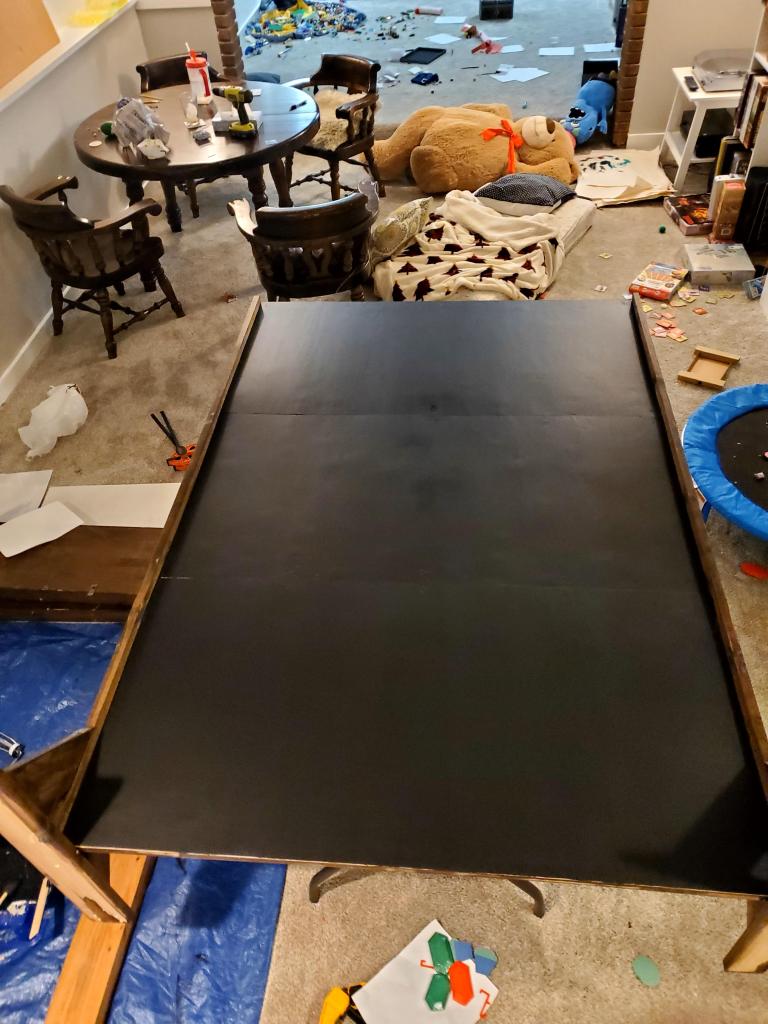
After all of the coats dried (which I lucked out with painting on the one somewhat warm Minnesota day in February!) it was time to screw it to the frame. I balanced the frame on a table and laid out all the boards on top. To secure the plywood boards to the frame I used 1/2″ woodscrews, 10 per board. The frame was designed so that the top and bottom boards would overlap their respective crossbeams completely, and the rest of the boards would each overlap each crossbeam by half.

To get a little nicer finish, I filled in each of the screw holes with wood filler, sanded them down, and then applied a final coat of the chalkboard paint.
Once the paint dried, it was time to attach the casters with some bolts. I went with 2 casters with locks and two without just to try to save on some cost. I ran out of stain before I got to the underside as well, but no one will be able to see that.

And the final product looked great in the workshop!

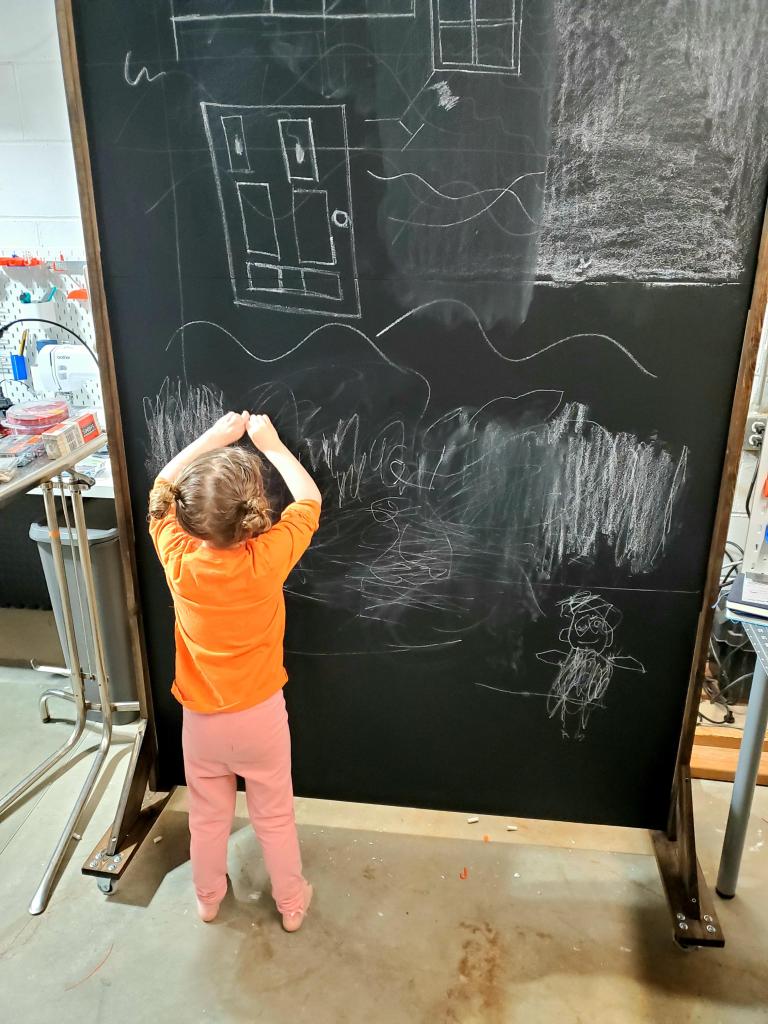
When I first tested the chalkboard out, I was a little disappointed – it was very difficult to write on and erased very poorly. It was a little discouraging to see so much work be put into an object I wouldn’t be able to use that well! But then I got some good chalk – Hagoromo from Amazon and it works beautifully! I guess I shouldn’t have counted on $1 chalk from the University ReUse store. If you set out to make your own chalkboard, make sure you get a foam roller for smooth application of the paint as well as some good chalk!
