It all began several years ago, with a book – The Hyrule Hystoria. With it, and its companion books, the Art and Artifacts and the Zelda Encyclopedia, our then two year old fell in love with the world and characters of The Legend of Zelda. Since our days since then are filled with stories about Baby Goron (her favorite character), I thought that a perfect surprise this year would be to have her own Quest for the Triforce.
The quest had to include all of the staples of a Zelda dungeon – map, compass, keys, treasure chests and rupees, concluding with the Triforce itself. My new Ender-6 SE was more than up to the task of being able to produce most of these.
The Keys
The quest had to include the two classic keys in almost every Zelda dungeon – the Small Key and the Boss Key. Thingiverse had just what I needed here – The Small Key by TheMasonX and The Legend of Zelda Boss Key by Budward. Everything else in the quest was going to be modeled off of Ocarina of Time for a consistent look, but I could not find an adequate Ocarina of Time boss key model and didn’t have enough time to model one myself with all of the other parts I needed to complete. So, the similar model from the Wind Waker would have to suffice.
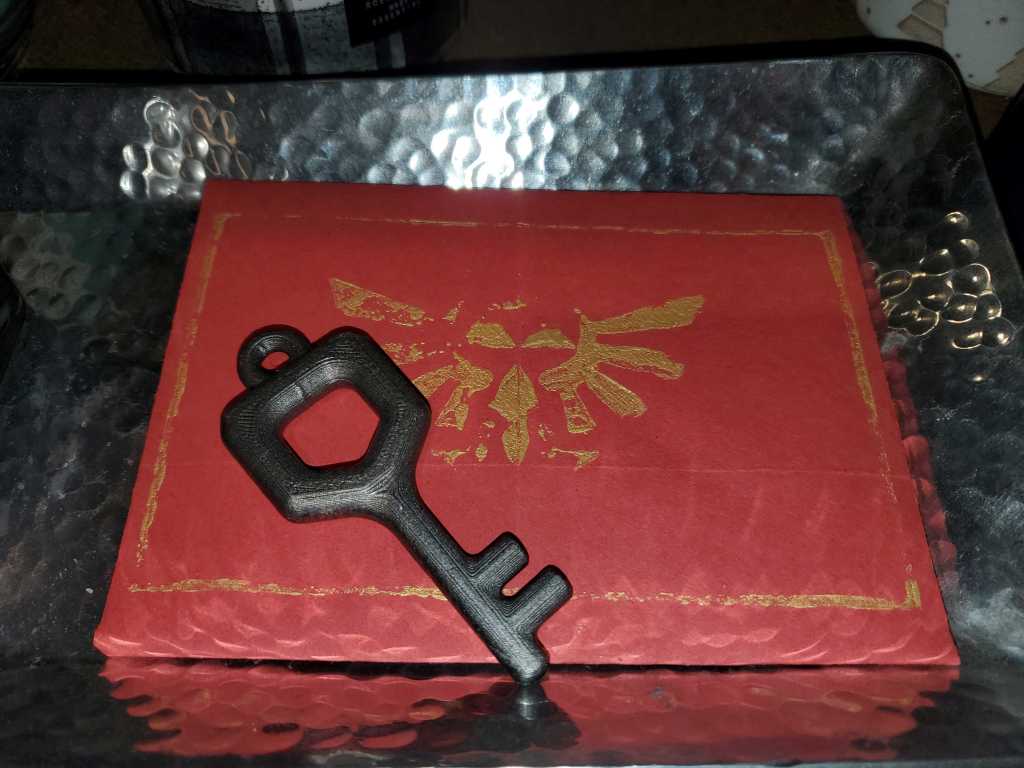
The small key was printed with grey PLA+ filament, sanded down, and then painted with a metallic grey spray paint.
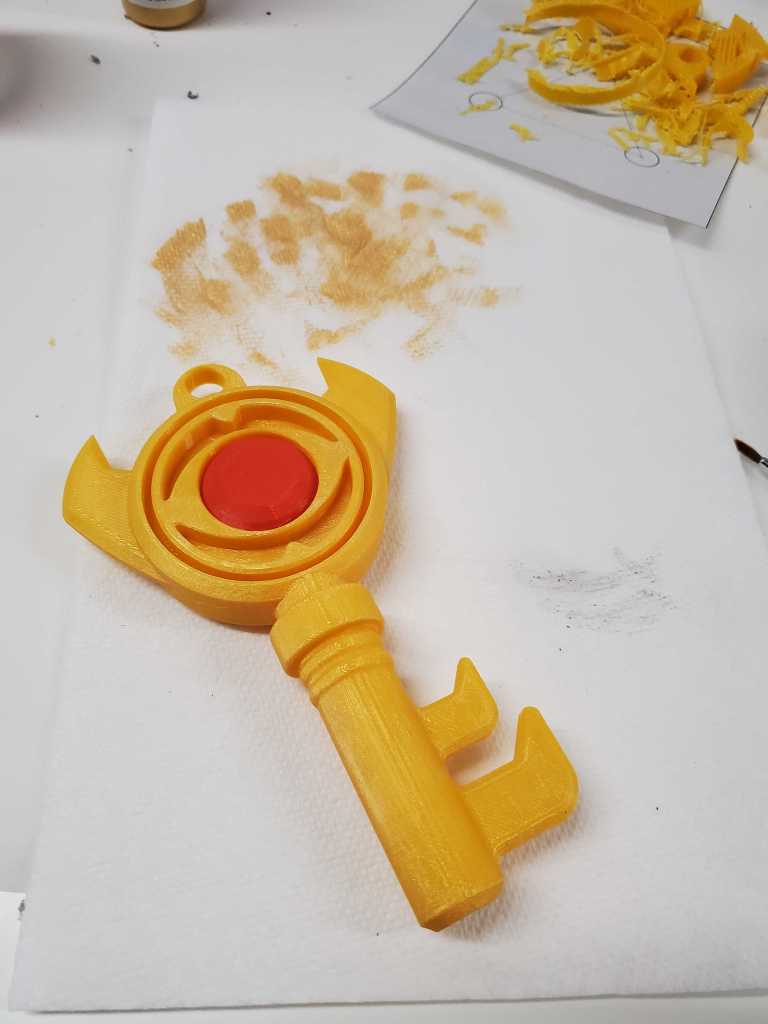
The boss key was printed in two parts, with the key being printed in a yellow PLA+ (which comes out fairly gold) with plenty of supports. The gem in the middle was then printed in red PLA+ and set in with a drop of super glue. It was then painted with a thin coat of glossy Mod Podge to give it a little bit of shine.
The Map
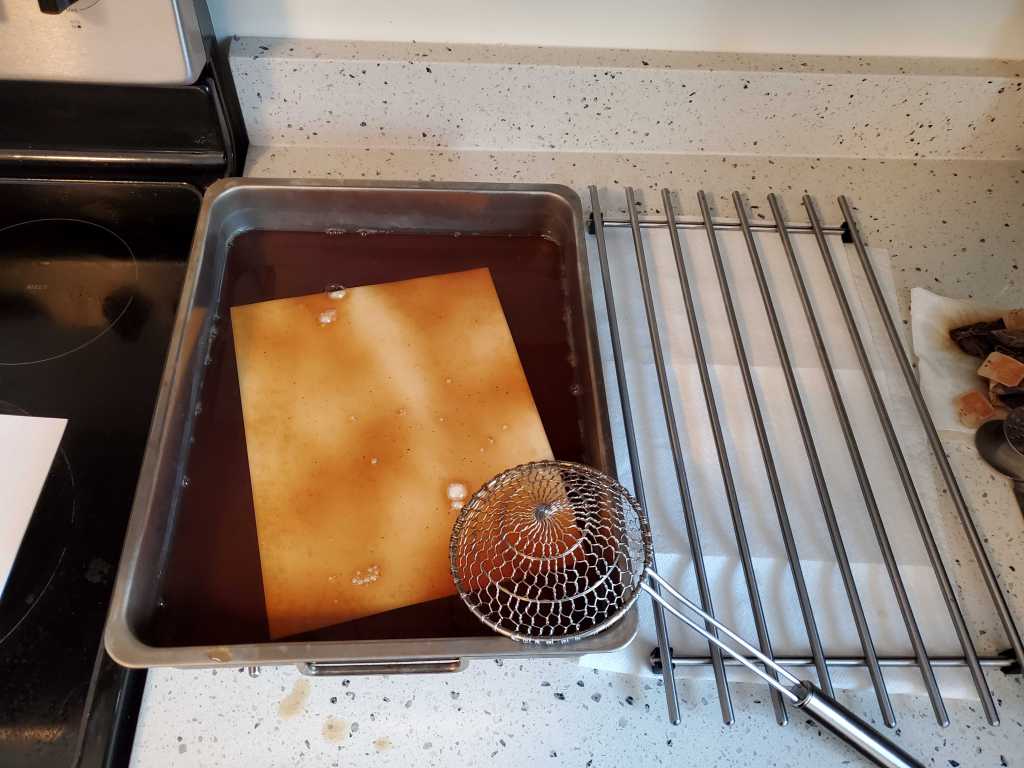
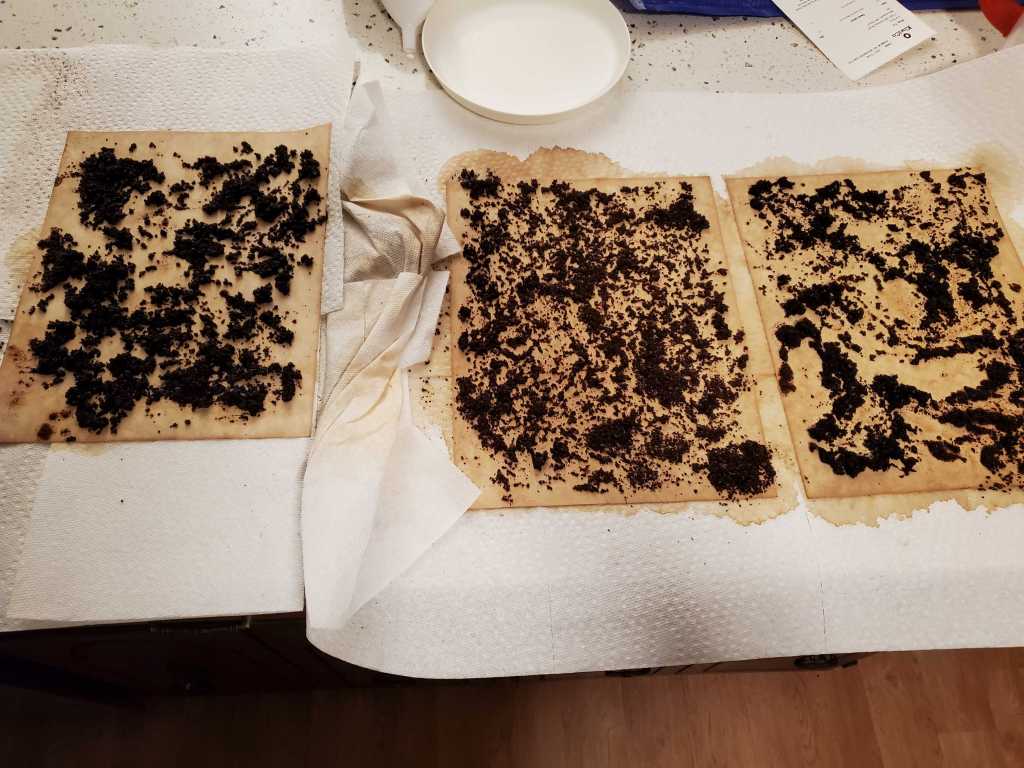
The map was designed in Affinity Publisher, modeled after our house and then printed on tea stained cardstock paper. The paper was soaked in a strong bath of tea and then smeared with old coffee ground while it dried to give a aged, mottled look.

After the print was finished, it was laminated to protect it. I was planning on doing this to protect it from 4 year old playing, but in this case it was extra necessary because I should have reversed the order of printing and staining! Staining the paper first with coffee grounds left a thin film that was impossible to remove all the way. After the paper was printed on, the ink began to smear off easily when touched, I’m guessing because of bad adhesion due to left over coffee grounds.
The Compass
The map’s companion within every Zelda dungeon, the compass, was a little more labor intensive since I could not find any reasonable model on Thingiverse. Being modeled from the Ocarina of Time, its model is fairly basic, so I decided to try my hand at modeling it myself. I am still a novice when it comes to 3D modeling, but tinkercad.com makes it very easy for even complete beginners to make great looking models.
First, a reference model from the game:
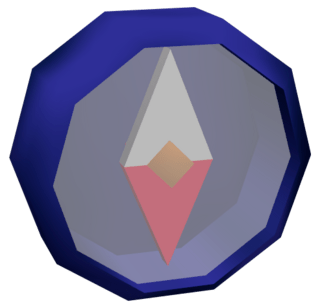
Keeping with the low polygon model from the original Ocarina of Time made it a lot simpler: a decahedral prism with a diamond spinner. I opted not for a face plate because I would have had to cut that from acrylic and I was not sure of the stability of the spinner after being played with by a four year old and wanted it easily fixable.
The polygon tool in Tinkercad made it easy to create a decagon, so I created the base decahedral prism 120 mm x 120 mm x 20 mm, easily fitting on a print bed and a four year old’s hands. The two inner cylinders to hold the spinner are 15 and 20 mm high, with a diameter of 10 and 5 mm, respectively. The cap was the exact same dimensions, 10 mm outer diameter and 5 mm inner diameter to make a very tight fit with the post. I could have printed the cap separately in a gold filament, however, since I was already using some gold spray paint for another project, I opted to just print the cap along with the case and paint it gold.
The dials were a simple triangle with a hole cut in the middle to allow the spinner dowel, and a pin and a matching hole so the two halves will be able to be snapped together. I printed one in red filament and one in white and snapped the two together. You can find the completed model at thingiverse.
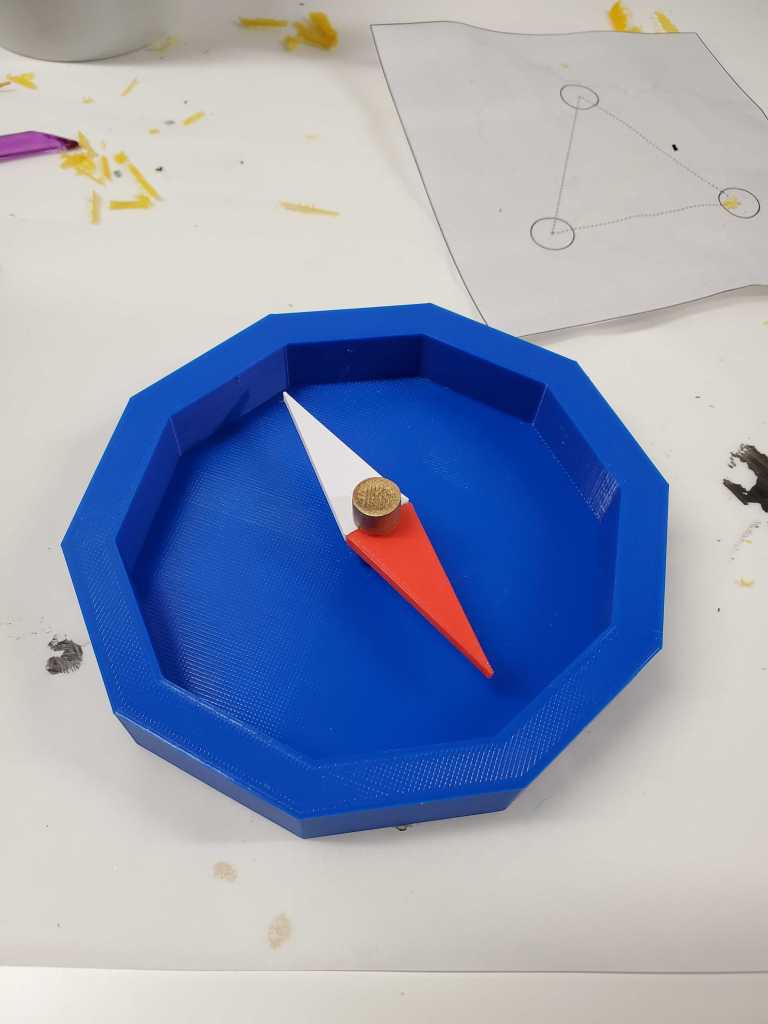
Once all four parts are printed out, they easily snapped together. I used a drop of super glue to connect the white and red parts of the dial, but just snapped the gold topper on, in case I need to replace the dial in the future.
The Envelopes
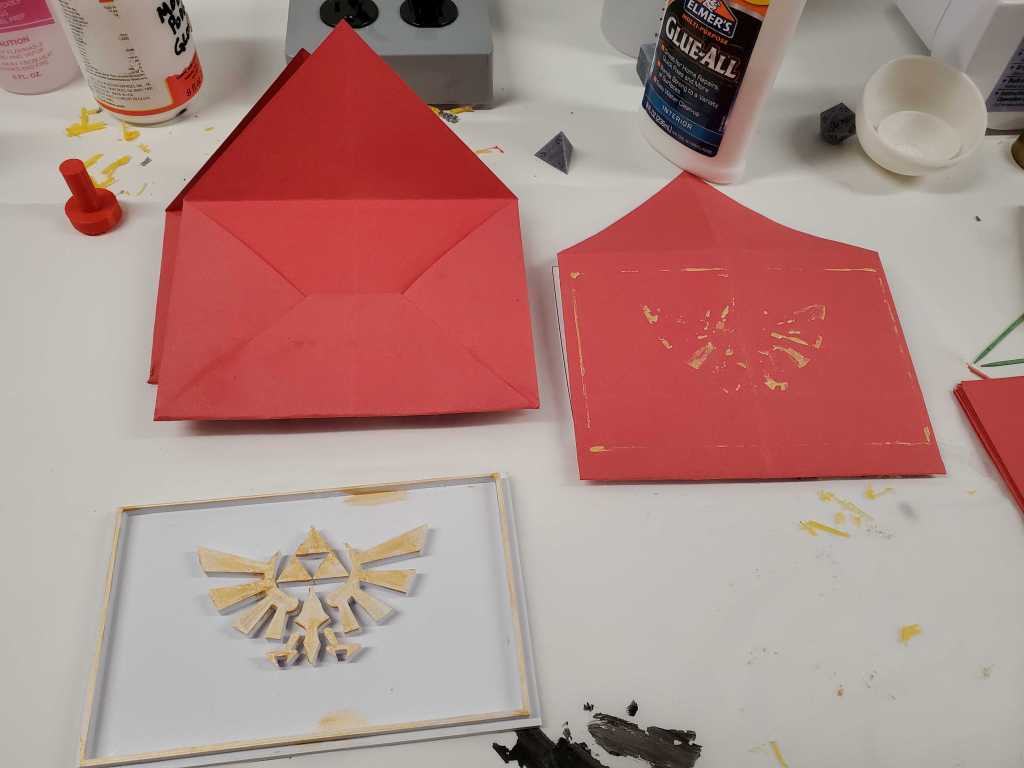
To hold the clues for the next present, I made some red envelopes with the Hyrulean crest stamped on them, sealed with gold wax and the seal of Hyrule. First, I needed some red envelopes. I had plenty of red construction paper, so a quick google search found a way to fold paper into a simple envelope that would work great for my purposes.


The envelopes were put together with a little bit of white glue to help hold them together. Next was the printing of the seal of Hyrule on the front of them. For this, I got an .svg file of the Hyrule crest, uploaded it to Tinkercad, and placed it on a thin rectangular base.
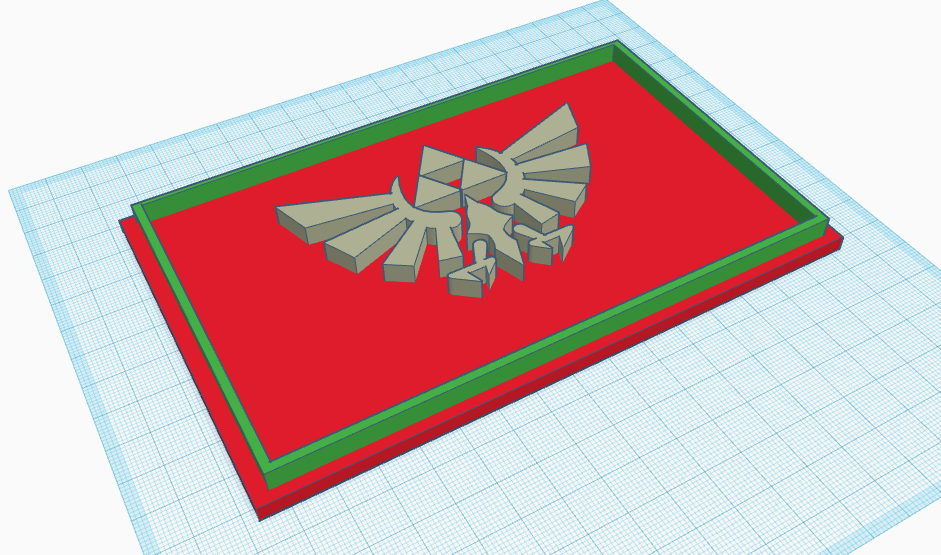
After printing this out, I painted the top with gold acrylic paint and pressed it down to the envelopes to make the stamp. This method is fairly tricky, I probably should have done some test prints out first. You need to get just the right amount of paint on the top so that gives good definition to the image but doesn’t start to balloon out and make the image blobby. After some trial and error I got some nice images out of it.

To seal the envelopes, I used a gold sealing wax with a custom stamp. Again, I loaded the .svg file into Tinkercad and put it on a small cylinder for a stamp along with a long cylinder with a handle. I printed the handle separately, so that the stamp could be printed with the flat side down and not need any supports.
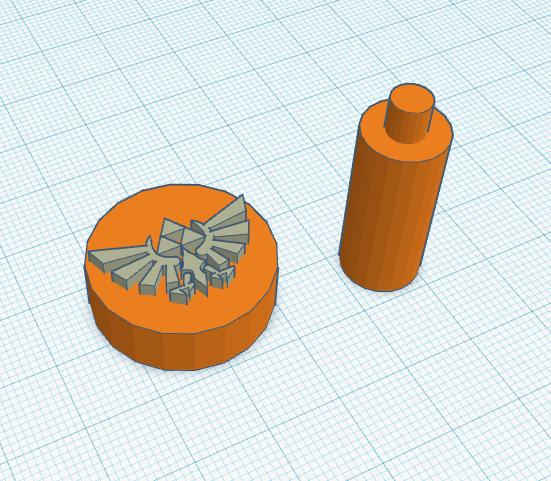
Printed out, I just need to melt some wax and press it onto the envelope to seal it up! This was another finicky step, the wax needed to be just the right temp or it would flow into the crevices of the stamp and stick to it instead of the paper. I think this was because of how deep I made the stamp, 3 mm. I didn’t have time to reprint a stamp when I sealed these, but if I would make another I think I would only go with 1 mm to make the stamping easier. I might test that out with another project.


Not too bad attempt for the sealing wax, but definitely could have come out cleaner.
To finish the project, I still had the treasure chest, rupees, and Triforce. I’ll be posting those builds in Part 2 soon!
