Several years ago we were gifted a small glass hat from my late grandfather’s collection. It sat on a shelf in our living room as a small memento until my wife read about uranium glass. We noticed that our little glass hat had the yellow-green pale color of uranium glass so we grabbed the only UV light we had – a nail curing light – and tested it. And to our surprise, it glowed! Uranium glass gives off an amazing “radioactive” glow when put under UV light. Thus began my quest to figure out how to put this amazing radioactive glow on display.
I worked sporadically for a few weeks trying to figure out how to best build a stand that could contain some UV LEDs that could illuminate the little hat. I didn’t have any of the tools to effective cut out the wooden display stand that I wanted, but as I was deliberating over what tools I would need to get, I came across the STRALA, a little, lighted Christmas display at IKEA.
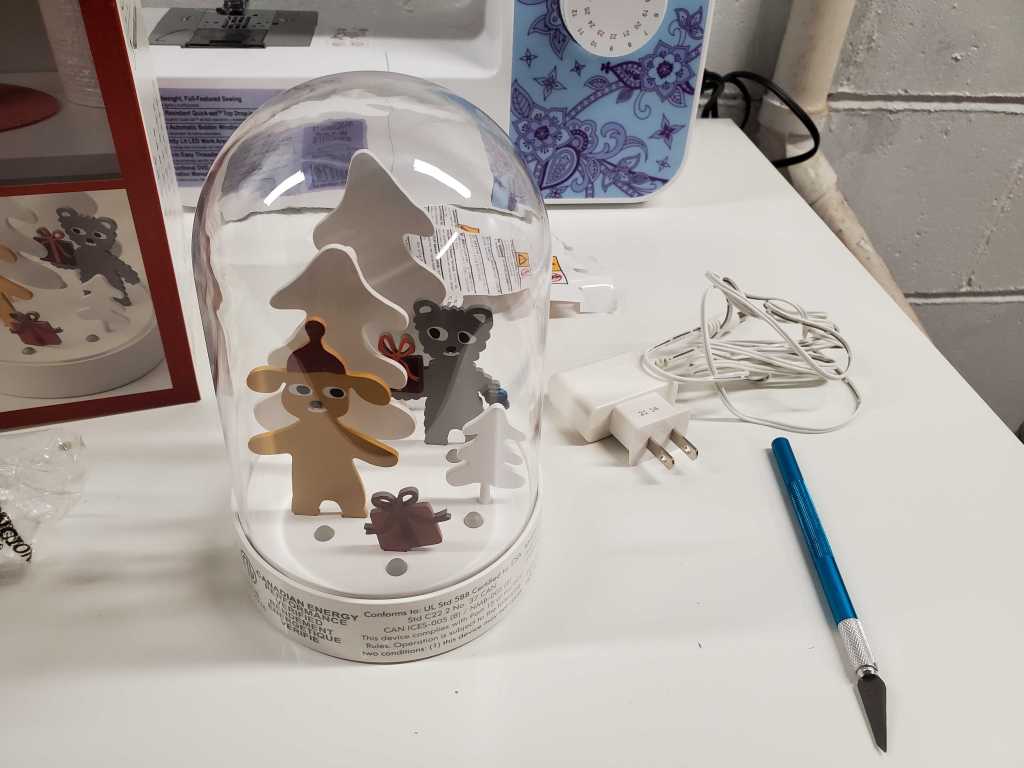
This little plastic dome was the exact dimensions that I needed, and it already had the wiring for LEDs along with a switch and rechargeable battery! I brought it home and got to taking it apart to hack it. The only other thing I needed were UV LEDs, which I got a string of from Amazon. The model I got is not available anymore, but any blacklight LED will illuminate uranium glass, I would imagine. First task, remove the dome and case and see what kind of electronics I was dealing with.

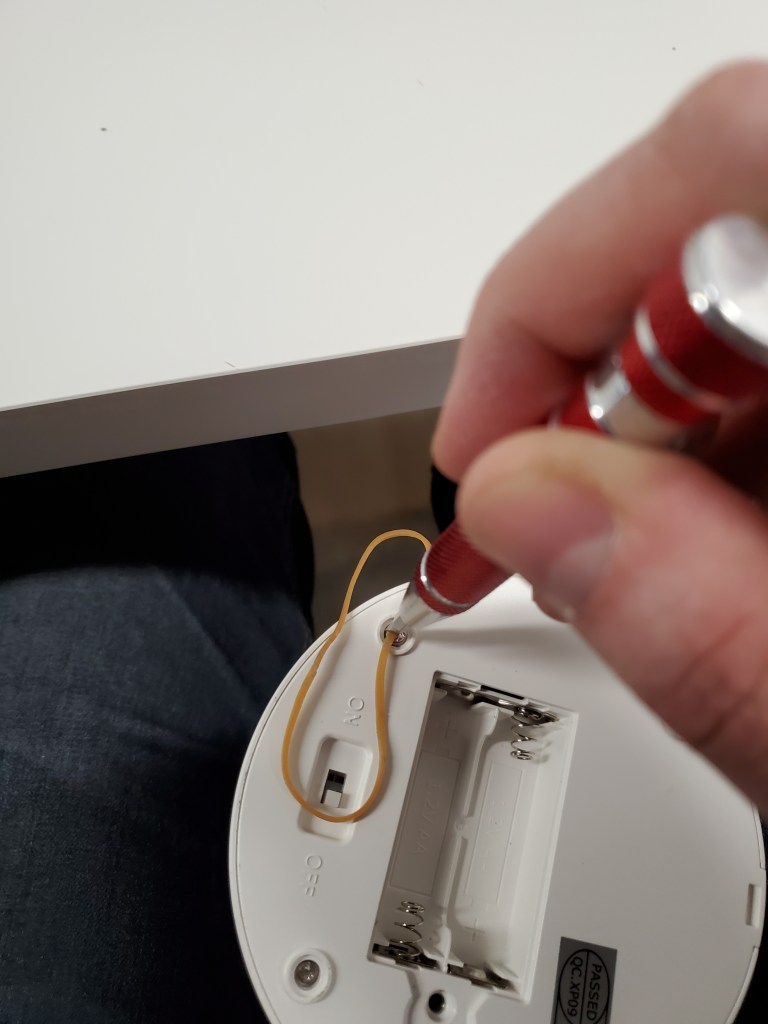
The STRALA is powered by two rechargeable AA batteries, with a charging port, which makes it nice and easy to replace when the batteries start to go. Removing the bottom case was a little tricky, because they used 4 screws of a type that I had never encountered in taking things apart before. They used one-way screws – a type of flat head screw with two quarters of the head ground down, so you can easily tighten it, but any regular screwdriver will slip out when trying to unscrew it. Luckily, the old rubber band trick to get out difficult screws worked like a charm.
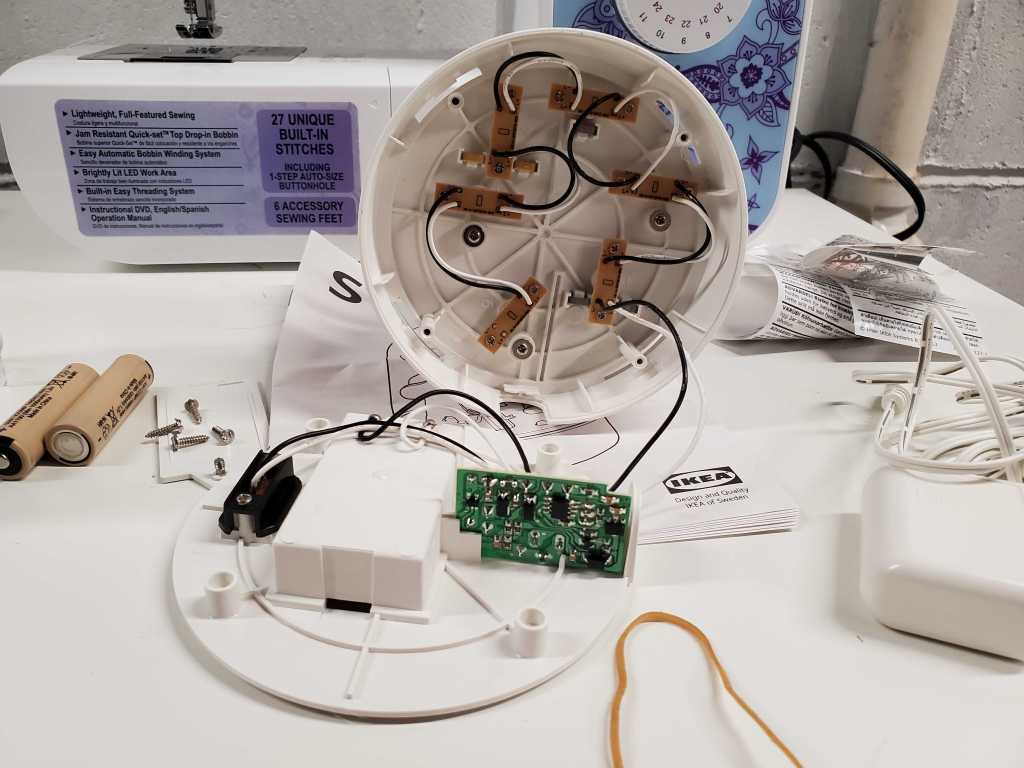
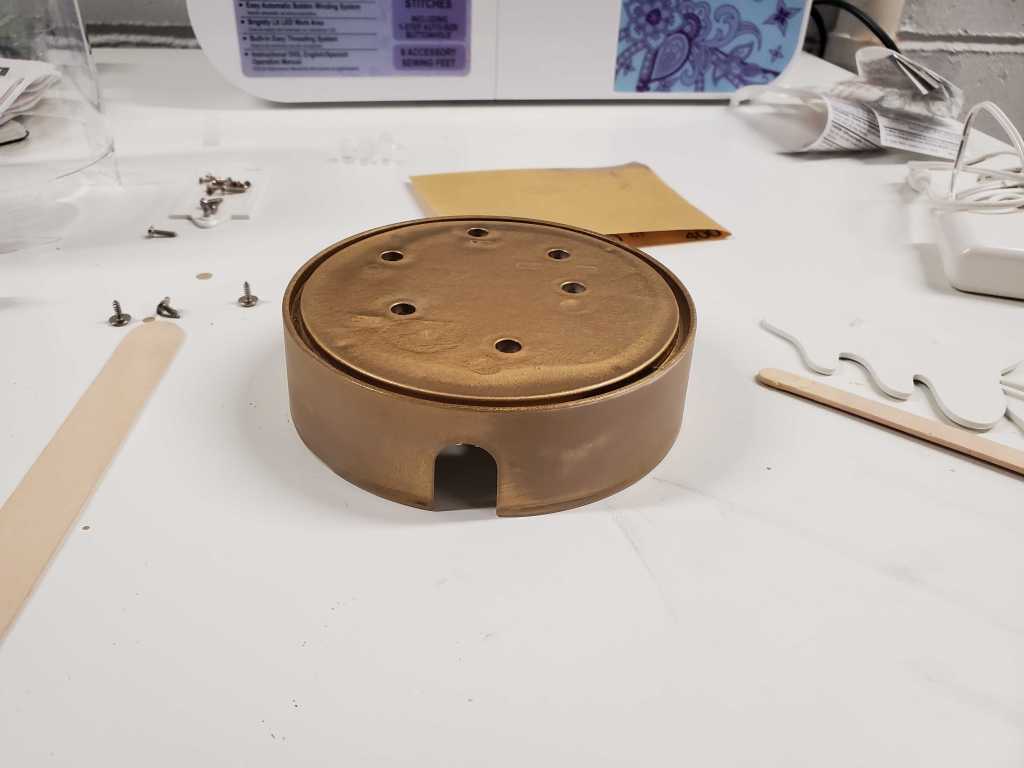
Once open, I could start disassembling it. IKEA electronics are usually very easy to take apart and the parts are usually fairly separate as well. The LED boards easily screwed out, allowing me to pop out all of the little figures inside. The dome is secured with 4 plastic tabs which are very tight – this was the most finicky part of the whole build. It would be very easy to crack the dome when removing it, you need to be very gentle with it. Now with it completed disassembled, I wanted to paint the base bronze to match some of our other decor. Before I painted, I wanted to take care of the bunch of holes in the top that the figures left. So I used some wood filler to cover the holes, then gave the entire piece a light sand for the paint to adhere to better. I gave it a few coats of a brass spray paint then, leaving a passable finish.
Next, it was time to replace the white LEDs with my UV LEDs. The LEDs in the strip were designed to run off of +5V from a USB, but the AAs in the STRALA only output a little over +3V, so I couldn’t just hook them directly up.
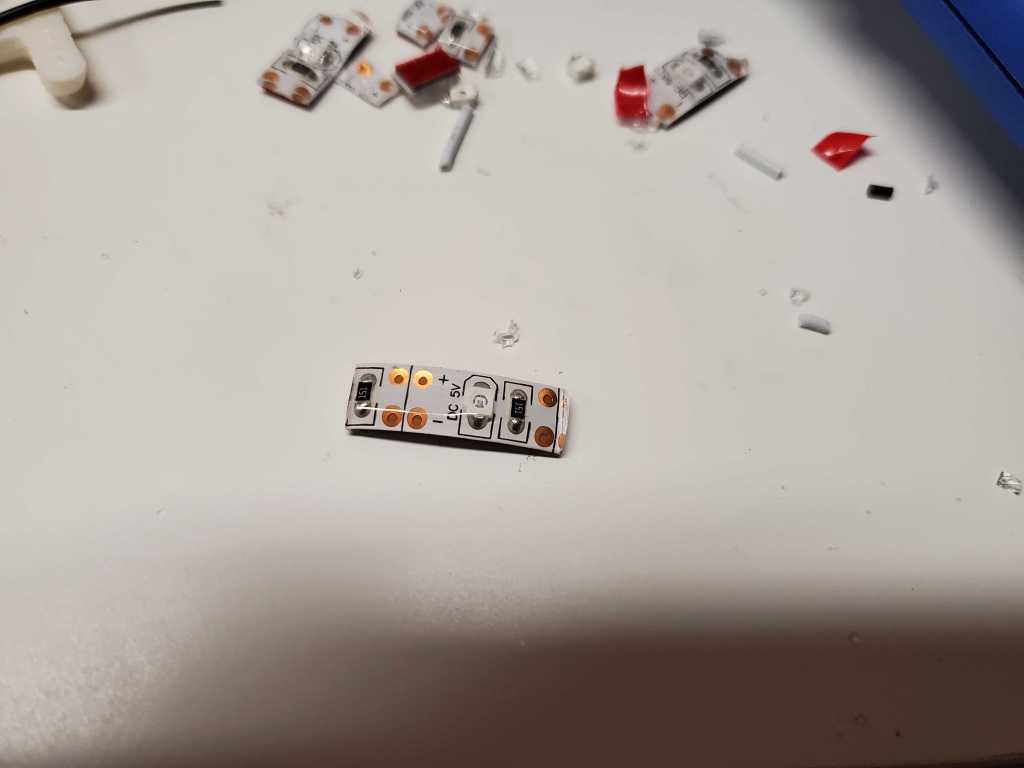
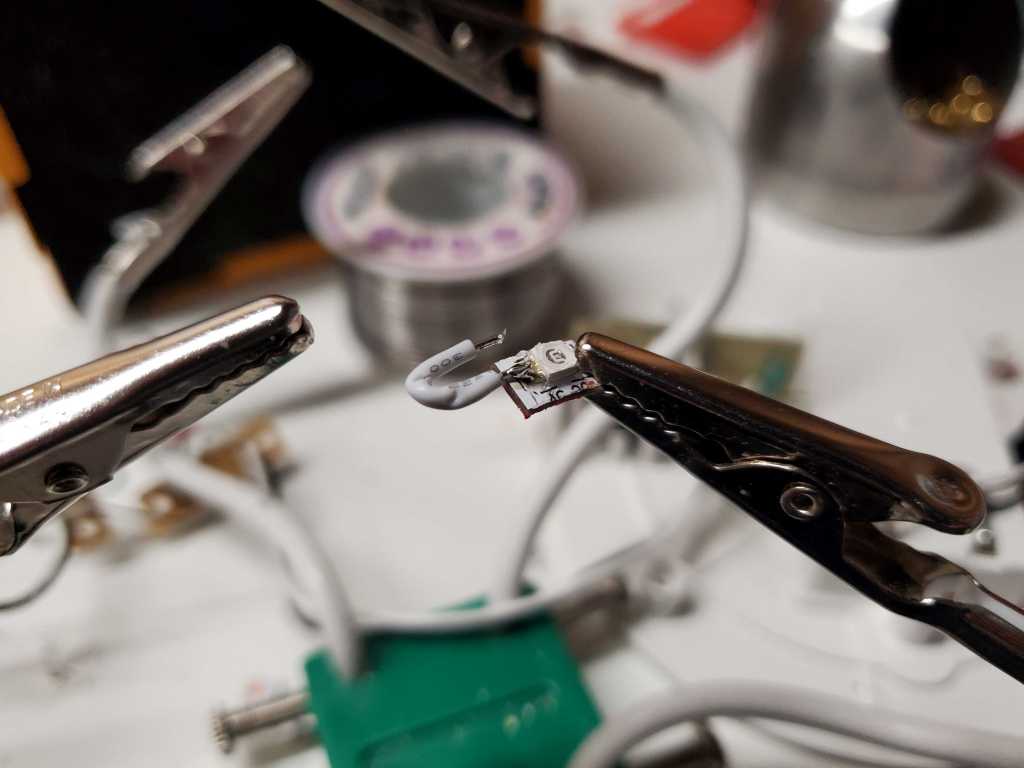
Measuring the voltage needed for the UV LED itself, it shone decently bright at around +3V on its own and was wired in with a resistor to take the other +2V from the USB input. This allowed me to cut the led from strip, and wire a very low ohm resistor into the whole circuit instead, so it wouldn’t lower the voltage too much. I was hoping I’d be able to solder the new LED right onto the old LEDs pads, but the forms were not exactly the same. The easiest solution ended up being soldering on two tiny wires directly onto the UV LED, then soldering the wires to the inputs on the little LED boards.

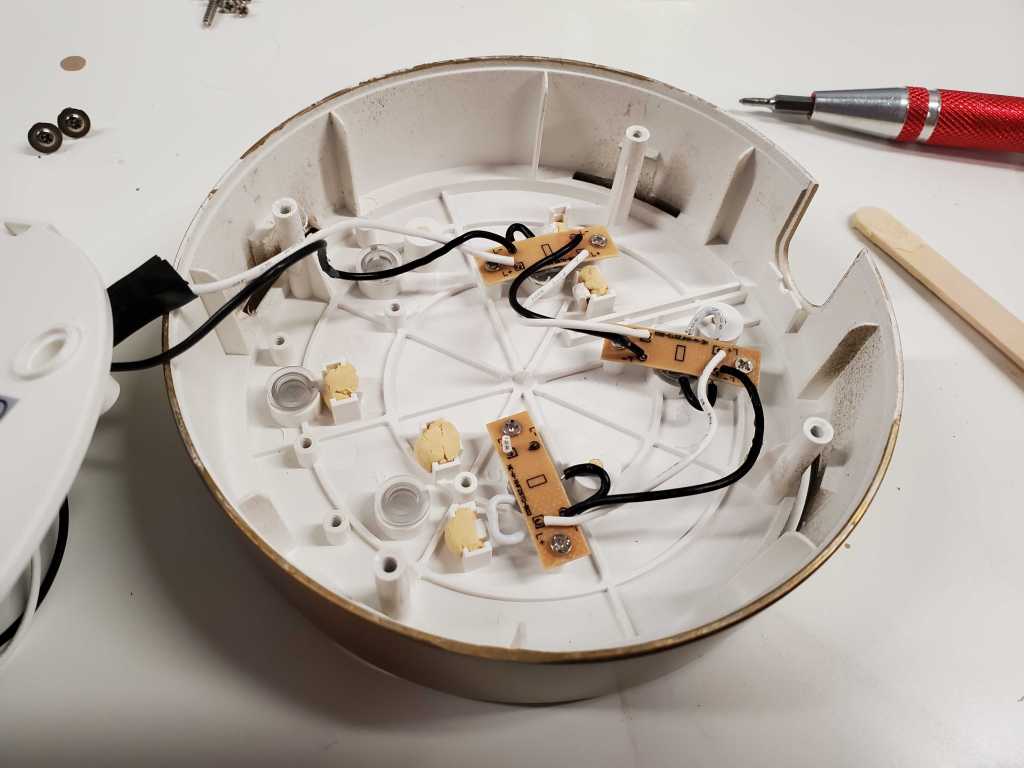
The LEDs are all wired in parallel, so I soldered in the circuits resistor at the main board before the LED circuit. The power from the batteries is no where near what is needed to run the LEDs at full power, but they emit enough to make the hat glow.
After all the new LEDs were soldered on, I screwed them back into the base. The new LEDs were a little bit bigger than the old ones, so they didn’t sit completely right, but the “bulbs” used on the top of the display are small plastic diffusers. So as long as the LEDs lined up to the diffuser bulbs, you’ll never know.
All that was left to do then was to put the hat on top and replace the dome!
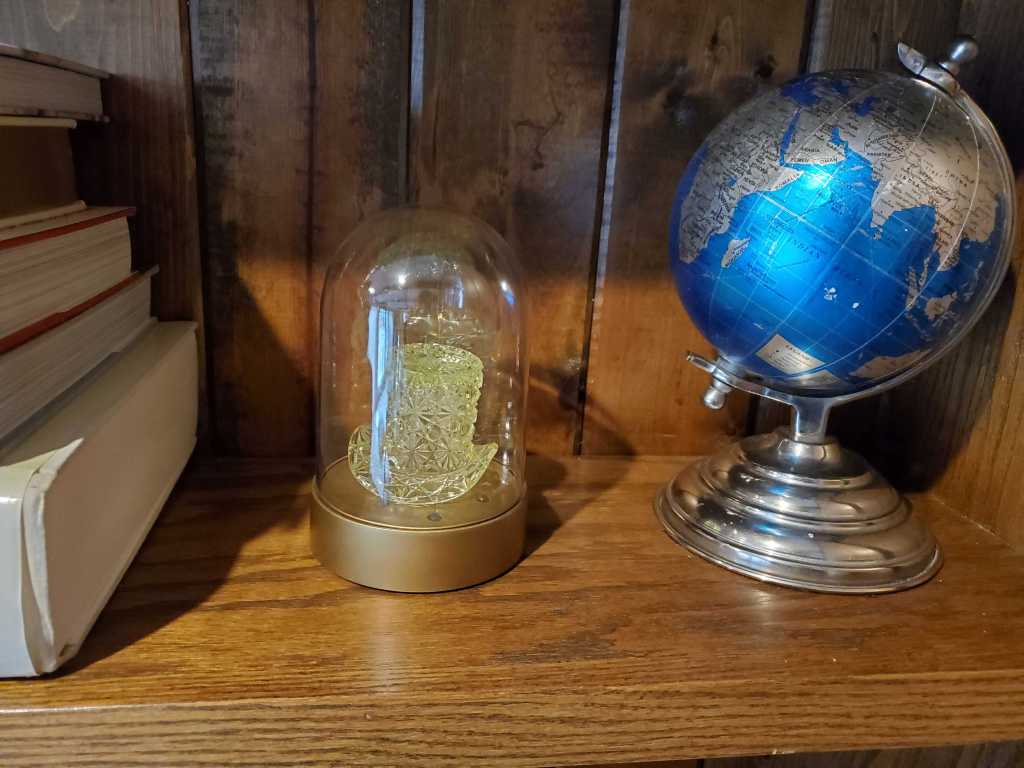
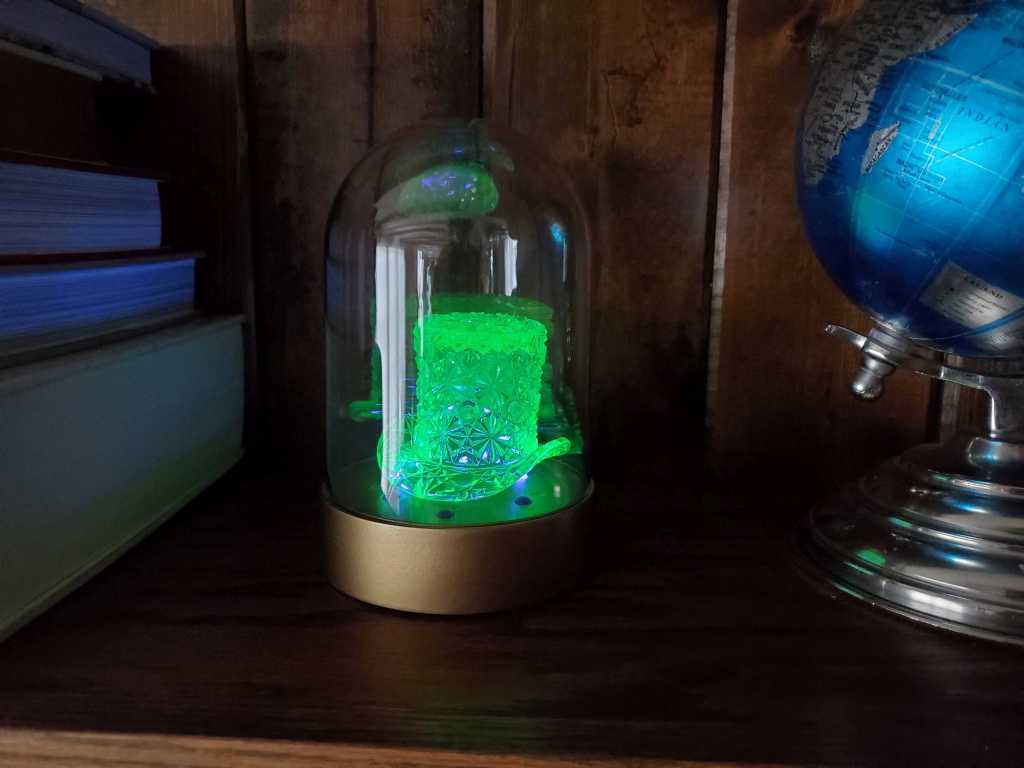
And here it is in all its glory! Overall, this whole project only took two days to complete, probably a record for me, from start to finish. Most of that time was letting the paint dry. We love it displayed on our living room shelf, and love how it elevates this strange heirloom. We have already started collecting more uranium glass and working on ways to display those pieces as well!
